Shared Knowledge
"How to: Replace a Laptop Hard Drive"
30 November 2009
Summary: the only time you would want to replace a laptop hard drive is when you know it has failed and must be replaced. If your drive is good but you need a larger drive, you would be better off doing a clone operation.
"How to: Clone a Laptop Hard Drive (PATA)"
Tools Needed:
- Very small Phillips screwdriver. (Must not be worn. Needs sharp edges.)
- Operating system (OS) install discs (not an upgrade but for new install). If you are trying to move from say WinXP to Windows 7, make sure your laptop hardware meets the requirement for the intended operating system. Most laptops have a partition on the hard drive that contains a "recovery" copy of the installed operating system. If the hard drive in your system is still functioning and you have not done so yet, make a copy of the recovery partition. Your system should tell you how to do this.
- Drivers. Determine the exact model number of your laptop. Not simply its series but its specifically model number. Most times the model number will be on a sticker on the bottom of the laptop. Armed with the specific model number of your laptop, go the manufacturer's website and download all drivers defined for motherboard subsystems such as audio, video, Ethernet. Once all has been downloaded to a computer hard drive, write all to a CD to use after you install an OS on a fresh, laptop hard drive. It is not necessary to make this driver CD bootable. Note that manufacturers like to use exotic names for drivers like 231145-dde.exe for the Ethernet driver. I suggest that when you do a save operation from the manufacturer's website, instead of the default name, you save to a name you will recognize later, like "Ethernet driver" or "Audio Driver", etc. Of course mark the CD as your laptop's driver disc and put the model number of your laptop clearly on the CD. Also not that although Microsoft's update website may know about some drivers for some manufacturer's hardware, but not all manufacturers post driver information on the Microsoft website. An example of this is Sony. Just make sure you have all drivers applicable to your specific model laptop before you begin.
- CD-ROM drive. If your laptop/notebook/netbook does not have a built-in CD-Rom reader, (many smaller notebooks do not) you are going to have to procure, at minimum, a USB based CD-Rom reader. You will need this to install an OS on the new laptop drive. No, you can not install an OS on a new hard drive intended for your notebook using a desktop or other laptop.
Use the following as guidance:
1. Make a backup copy of all hard drive data. If your laptop is completely dead, obviously you can not do this but otherwise burn CD(s) or DVD(s) of all your data. If you laptop is on a home network, perhaps you can copy data to a drive on another home computer? Then wipe all traces of your data off the drive, especially if you plan on selling the old drive on eBay or other.
2. How to enter laptop BIOS? Determine what keyboard function key (F?) or key combination will get you into your laptop's BIOS (Basic Input, Output, System) settings. On most modern laptops, when it does a boot operation, it will have a message at the bottom of the LCD such as, "To change SETUP press XXX." "XXX" could be Function key 1 or 2. Once you have the new drive installed in your laptop, you are going to have to change the "boot" priority stored in the BIOS from the hard drive to the CD-ROM.
3. Locate where your hard drive is located in your laptop and remove it.
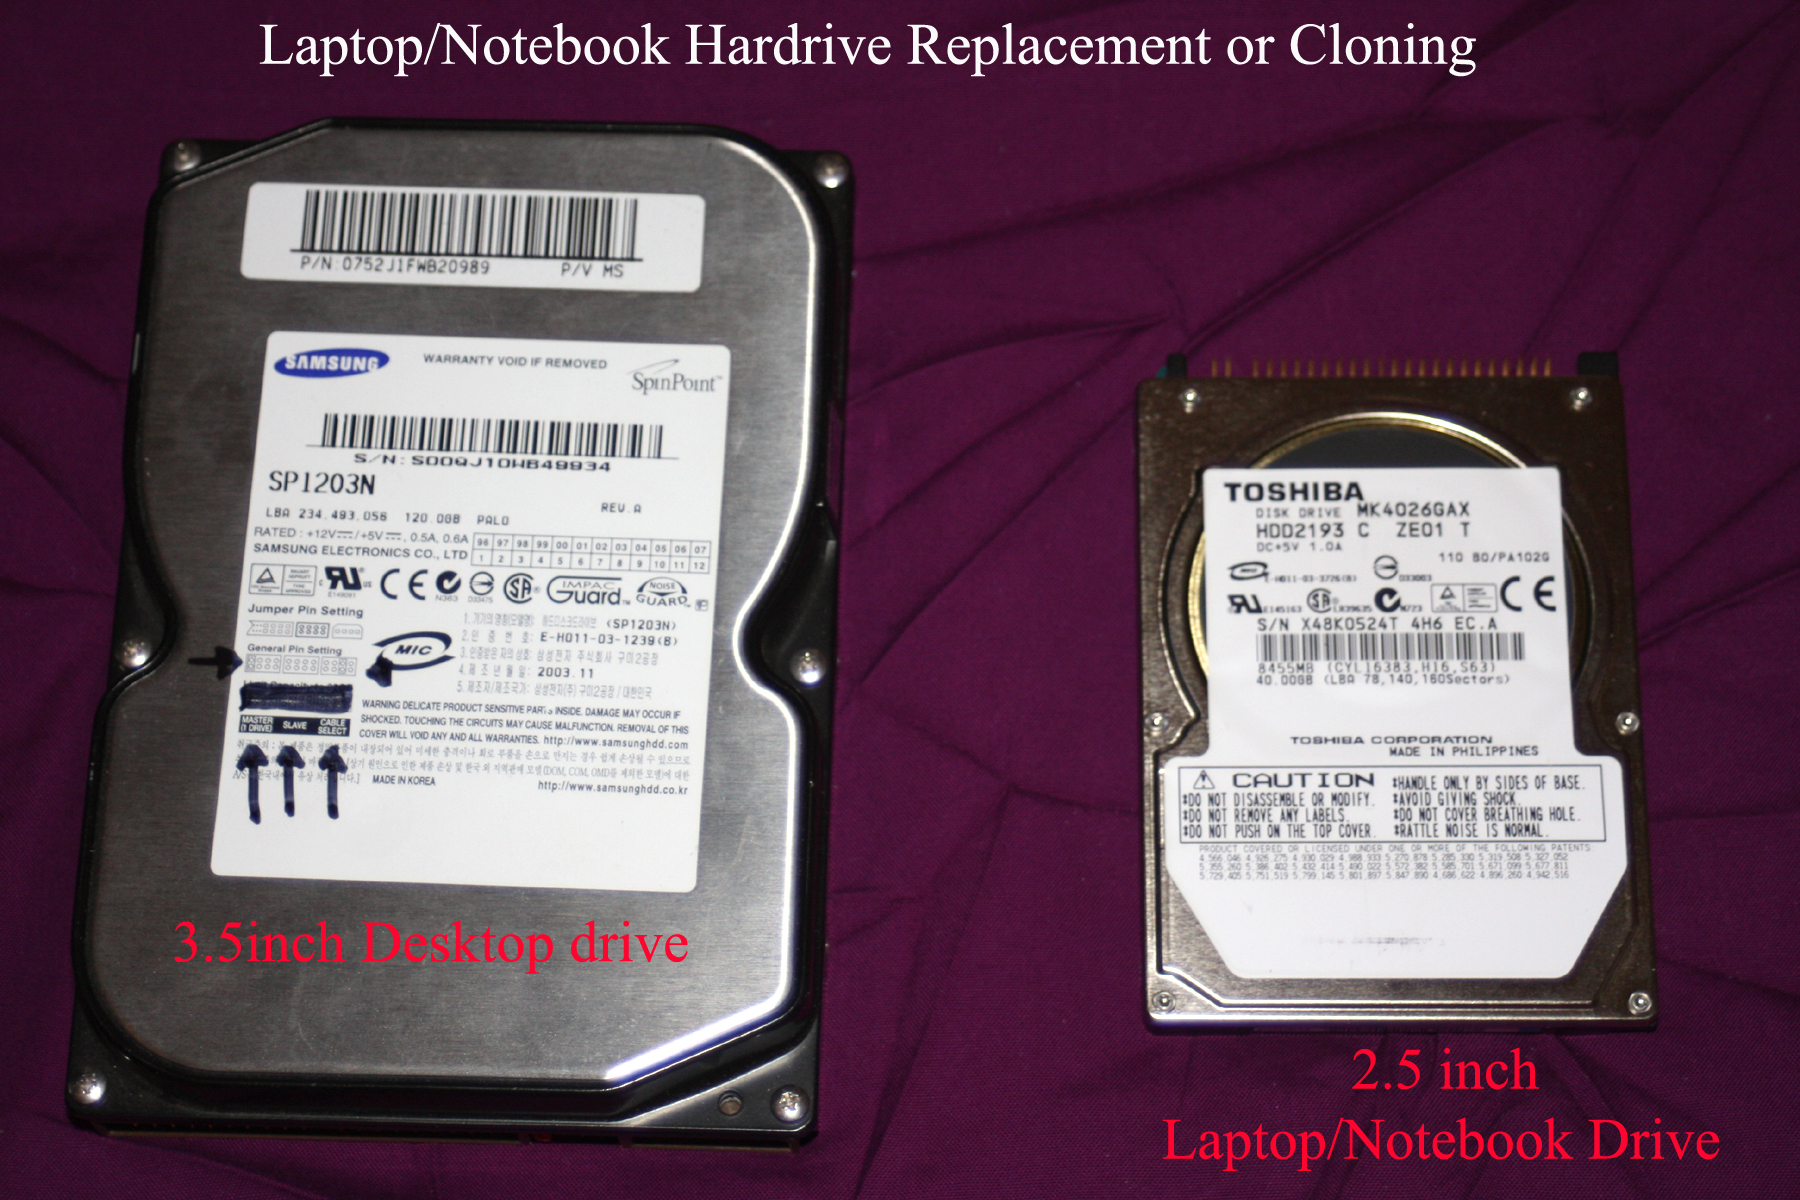
"How to: Locate and Determine the Type of Hard Drive in a Laptop
4. Procure a new laptop hard drive of the same type as you old drive. Laptop hard drives are getting very cheap per megabyte and why go through all the effort of replacement to only expand by 20% or 50% or even 100%? To me, a reasonable size laptop drive these days is 250GB's, which costs about $80 new. Oh, laptop/notebook hard drives are of the 2.5inch form factor type so when you go to buy one, make sure you get one marked "Notebook." Now on eBay lots and lots of hard drives are for sale and many are of the notebook type. I have never bought a drive off eBay but have sold plenty. In my mind, for all the effort required to install a new drive, go with new and register the drive with the manufacturer right away. Most new drives have either or 3 or 5 year warranty.
5. Install drive in caddy and reconnect special connector, if any. With new hard drive in hand, install in caddy (if any) and any connector that might have been on the end and then mount new hard drive into your laptop. Once you have the new drive installed in the laptop, you are ready to insert the battery and connect the power adapter. Obviously, if you had to remove a switch board or lights status panel to get at the hard drive, you must reinstall these now.
6. Power up system and get into BIOS. Now power "on" the system and press the key or combination of keys you determined is required to get the BIOS settings screen to display.
7. Insert OS install disc into CD-ROM. Now with the laptop turned "on" and the BIOS settings screen being displayed, insert the OS boot CD into the laptop's CD-ROM reader.
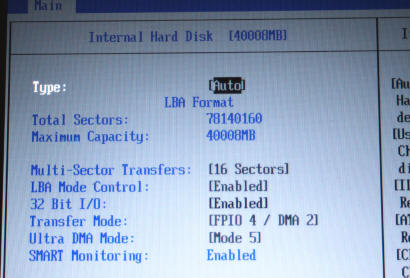
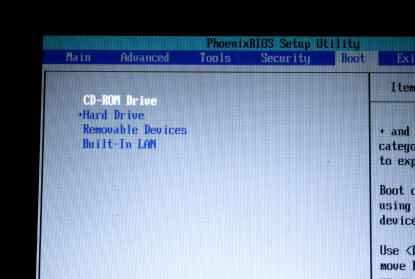
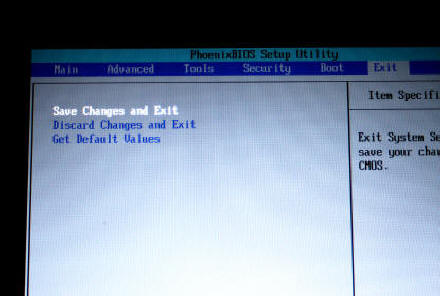
8. Verify and Change BIOS Settings. Now most BIOS settings screen/menus are pretty much the same and now (1) Use the tab that lets you see that the BIOS recognizes your new hard drive (2) Tab to the menu that allows you to change boot device order and change it to CD-ROM and (3) tab to where you save your current settings and exit.
9. System boots from OS install disc. At "Save Current Settings" or similar, your laptop should reboot and this time automatically go to the CD-ROM and attempt to boot from the OS disc you inserted into the drive.
10. Install OS. Now follow the instructions you will get on the laptop screen from the OS install. If you have never installed an OS before, you might be stumped at a place or 2 in the questioning but usually a default setting will work just fine. Now because the new drive has never been formatted, the install disc will note this and ask what format you want and how much of the drive you want to dedicate to the operating system and "yes" you can divide a large physical drive into several smaller "virtual" discs if you wish to. I personally have never found dividing a large laptop drive to really "buy" me anything.
11. Install drivers. Once you have the OS installed, the OS might start finding hardware for which it does not have a driver. This is where you will need that CD-ROM you created with all the drivers for your specific model number laptop. Now, insert your "driver" disc and when asked where driver is located, tell OS your CD-ROM and specific name of driver.
12. Change boot order in BIOS. Do a cold boot (shutdown OS so system powers off & then turn laptop back on again.) Again press the key or combination of keys to get into the BIOS and go to the menu that allows you to change boot order and define the hard drive as the first boot device. "Save to BIOS" and your system will reboot. Remove the OS install disc from the CD-ROM reader.
13. Activate OS, if required. Once you know that the Ethernet hardware on your motherboard is alive, go ahead and attempt to activate the OS via the Internet. Now since the OS was activated once in the original install (unless you have bought a new complete install), activation may say something like "Installation count exceeded" or something like this. In this case, use the telephone number provided and call the support line. Then explain that you are replacing a hard drive and the OS install is only on this one laptop. Support will then give you a new activation code to use.
14. Download updates to OS. With your OS installed and activated and all drivers installed, you will have to go to the OS developer's website and start the long process of downloading all applicable OS updates. Using Windows as an example, many laptops shipped with WinXP with service pack 1 or 2 and thus will need download and install of service pack 3. Use Windows download site and have it determine what downloads your system must have.
15. Disk cleanup. After the OS is completely current and all drivers are installed, do a disk cleanup operation. Disk cleanup is an program/utility with Microsoft OS.
16. Disk defragmentation. After a disk cleanup, do a defrag operation. Defrag is a Microsoft OS program/utility.
17. Leave laptop powered "on". Now let the laptop "cook" for several days, if at all possible by leaving it on 24/7. If your new drive is going to fail, you want it to fail before you go any further in the replace operation
18. Scandisk. After the "cook" period, if Windows based, do a disk scan operation to see if there are any drive errors. There should not be any.
19. Install all applications. Hope you have all the code keys. Once installed make sure you check developer's website for any updates your applications might need.
20. Reload all data.
21. Reload critical data. When you are confident your new drive is working properly, reload any critical data.
22. All done. :) Almost.......
23. Make data backup. Do not trust to nothing. If you do not have CD or DVD backups of application installs or your data, make them now and periodically. Can not tell you how many people I have talked to that left their laptop running, went to work, there was a lightening storm and zap, PC did not work when they got home. Nothing substitutes for backups.