Shared Knowledge
"How to: Repair Maytag LDE6914ACL Electric Dryer"
19 March 2007
Summary: a dryer is a very simply device and certainly in the realm of do-it-yourself (DIY) repair for anyone with some standard home tools and a willingness to try.
Background:
Had a friend that called me about her dryer making incredibly bad noises when it ran. It did dry but seemed to always be on high heat, no matter the temperature setting she selected and the noise was unbearable. So, gathered up my tools and headed over.
Now I have never been inside a Maytag LDE6914ACL electric dryer but as I have written in another one of my "Shared Knowledge" pieces, washers and dryers really are very simply devices with very few parts, so what follows is a sort of image slide show of what I did to get in an repair her dryer and oh, the problem she had was a busted blower fan.
Repairing a Maytag LDE6914ACL electric dryer:
(1) Unplug the dryer and be careful in doing so. This dryer and most dryers are 240 volts and one slip and you are dead. No fooling around with 240 volts. If you are uncomfortable with electricity at all, do not attempt DIY dryer repair.
(2) You are going to need a good flashlight or other strong light source, a Phillips head screw driver and 2 different size nut drivers or a small adjustable wrench. Sorry, but I have already forgotten the size nut drivers I used but they are only one size apart and you will only need the 2, so once you find the 2 you need, you got it made.
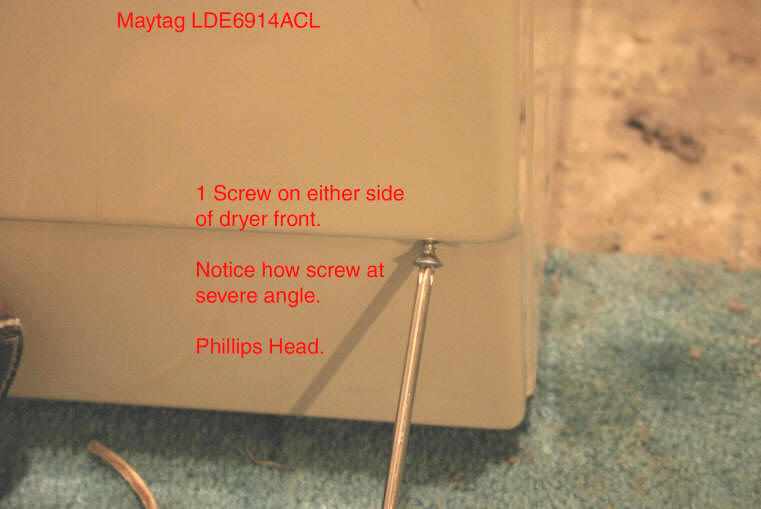
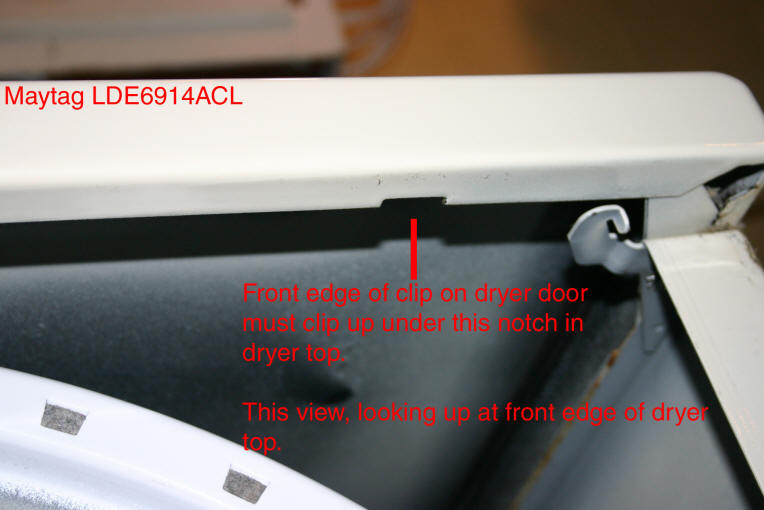
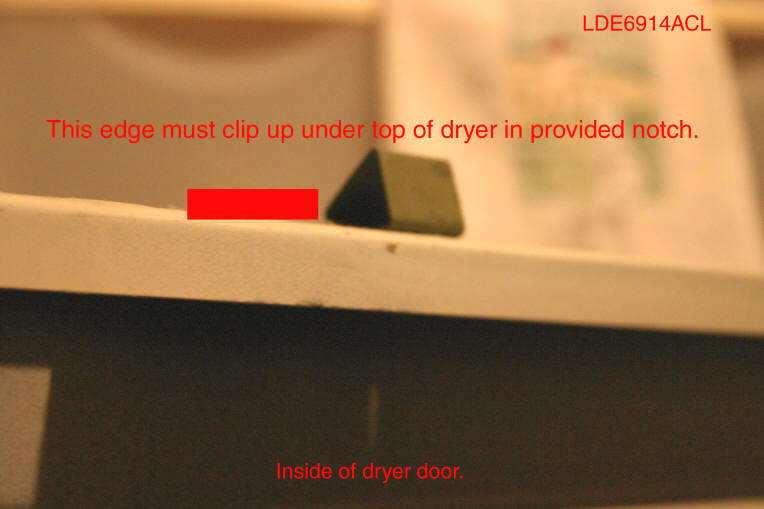
(3) Although there is a small access panel on the rear of the dryer, this is only good for reattaching the drive belt if you have to replace the belt, otherwise, you have to remove the dryer door to get to any other part like the motor or fan or heater core or any of the various temperature or overheat sensors. To get the front door off, you have to remove the 2 Phillips screws at the very bottom of the front door that are angled up steeping into a support bracket mounted on the chassis of the dryer. After you have the 2 screws removed, there are 2 metal clips at the top of the front door, that are slid under the front edge of the dryer top and to get the door free of these, you have to lift the bottom of the front door upward until you hear the clips let loose. If the door does not want to come free, apply some pressure near the top of the door with the door almost horizontal to the floor. Once you have the door free, swing it to your left and let it rest against something. As it has wires attached to it for the door switch and interior lamp, do not jerk the door free. There is no need to remove any wires from the front door, except, perhaps for one green wire at that connects to a sensor at the bottom of the door opening.
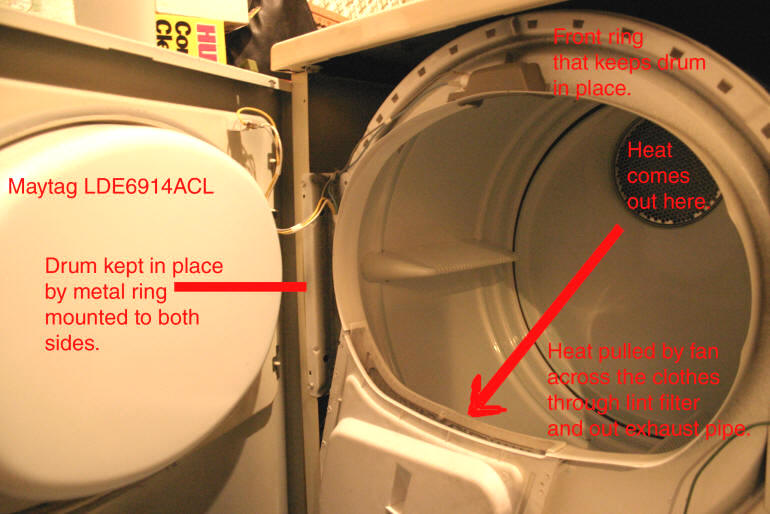
(4) The image below shows the dryer door removed from the dryer chassis and set to the side. The dryer drum sets in a felt lined groove on the back of the dryer and sets in a felt lined groove in a metal shroud at the front of the dryer. This front metal shroud is held in place by 2 brackets on either side of the dryer, each having 2 screws. The lint filter assembly is a part of the front shroud.
Once you have the screws out of the front shroud, the shroud will lift off the drum easily and again, just set it aside to your left.
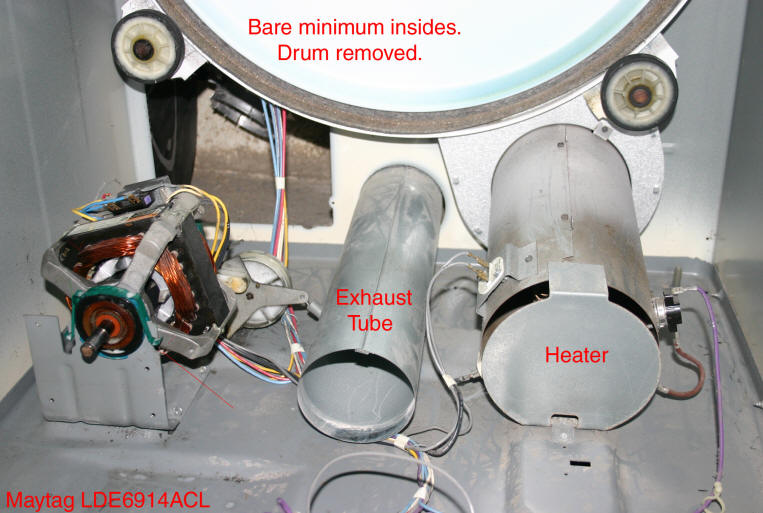
(5) The image below shows the interior of the dryer with the front door and front drum shroud removed.
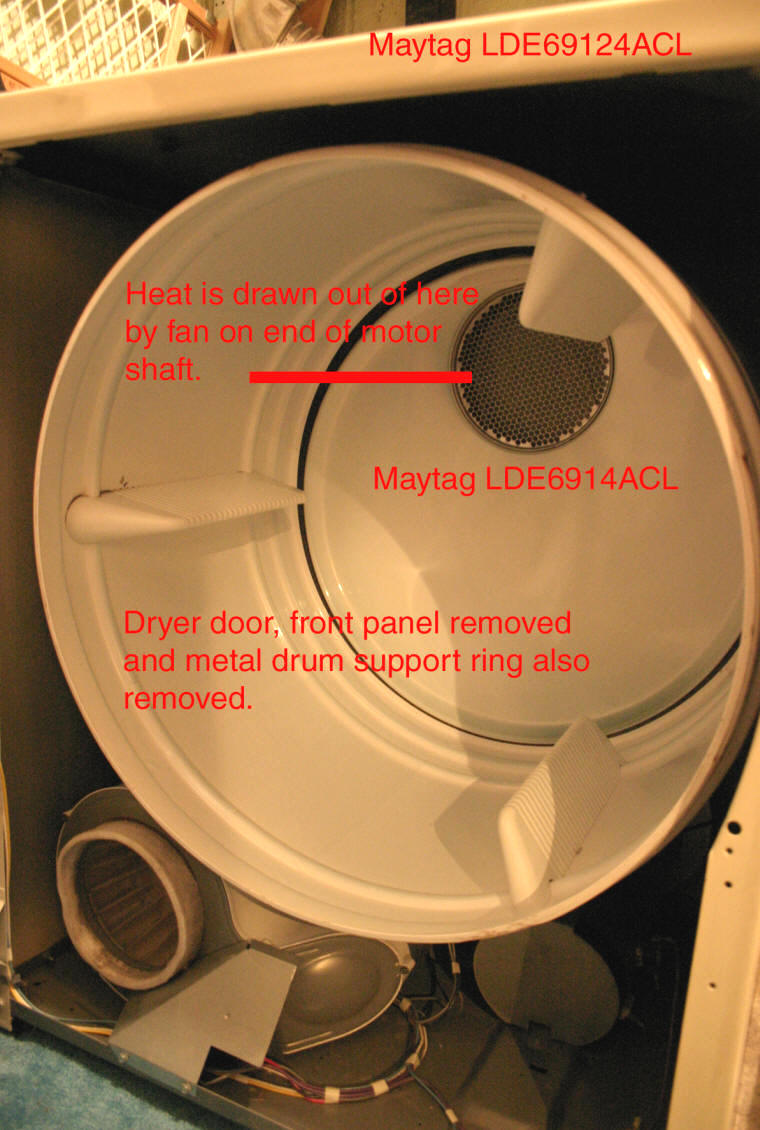
(6) To remove the drum, simply lift it out of the dryer. Again, it sits in a felt lined groove on the back of the dryer but with the front shroud removed, it will simply lift out of the dryer and it is not heavy. The image below shows the insides of the dryer with the front door, the front drum shroud and the drum removed.
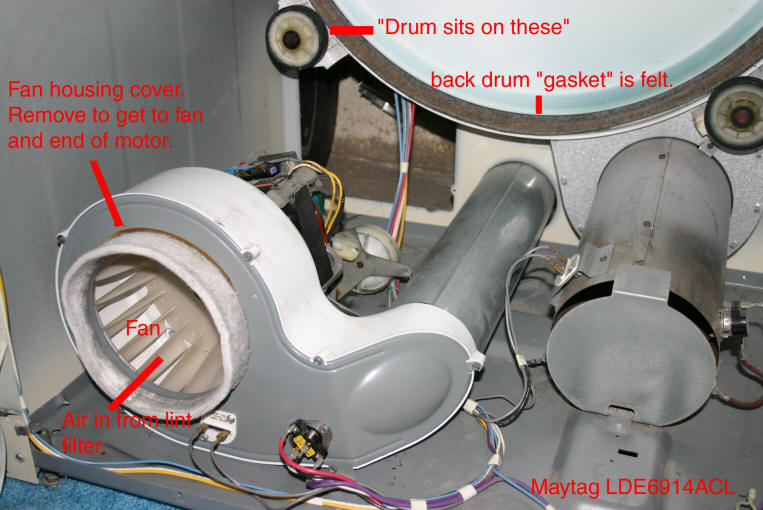
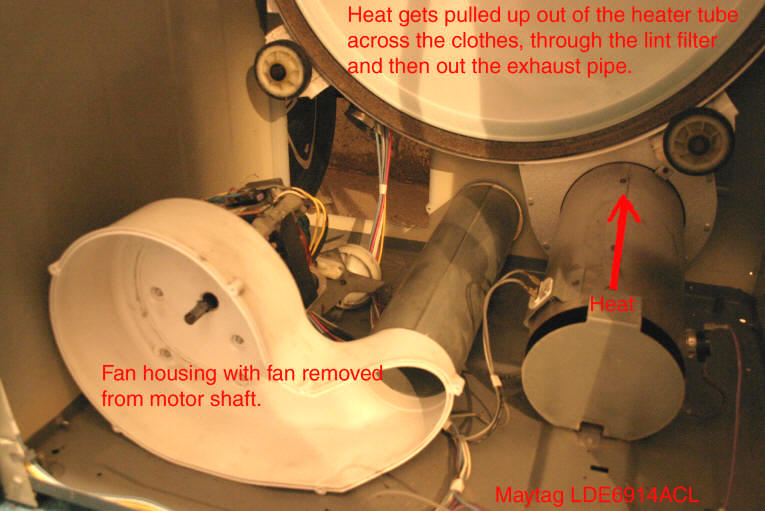
(7) Now in my case, the dryer was making a terrible noise when the motor ran, so I had to get to both ends of the motor and test it without either the drum attached or the fan. As you can see, on one end of the motor, there is a grooved shaft that the drum drive belt goes around and on the other end of the motor is a fan. This fan draws the heated air across the clothes as they tumble in the drum, down through the lint filter and then exhausts out the pipe shown to the back of the dryer. So the next image shows where I removed the fan cover and removed the fan from the shaft of the motor. It was here that I discover the fan shaft was all broken and that the fan was not locked to the motor shaft and thus making terrible noises as it "free wheeled" around the motor shaft.
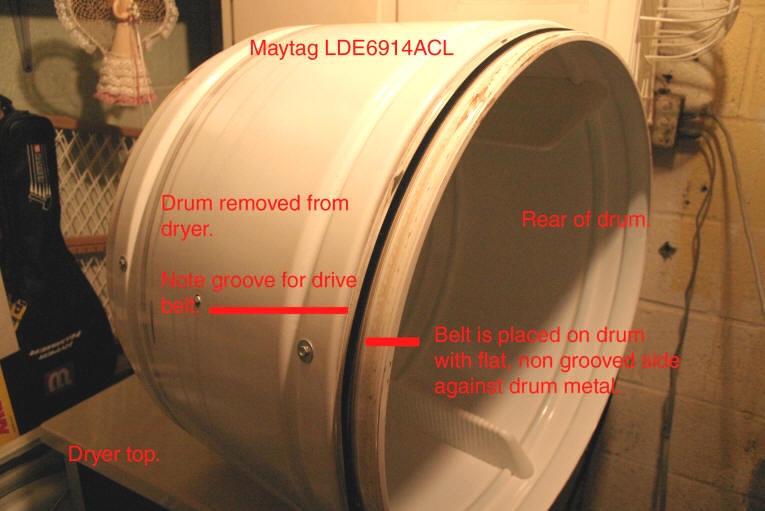
(8) Once I had determined that the fan was bad, I took a hard look at the drum drive belt and determined that it was time to replace it. Why? It had cracks in it and the edges where worn, splitting. Since I was already inside the dryer, why not replace the drive belt? So the image below shows how I positioned the new drive belt on the drum. The drive belt goes in a groove on the rear of the drum and the belt goes around the drum with the flat or non grooved side against the drum.
(9) Now since I was inside the dryer, I decided to clean it all out and take a harder look at the front of the dryer motor shaft end, so I removed the blower housing from the motor. The image below shows a pretty empty dryer at this stage. If you have to replace your motor or electric heating element, this is where you are going to need to go with disassembly. Now note that the motor sits on a motor mount and is held in place at each end via a sort of compression clip. This clip has 2 holes in it which fit down over a tab on the motor mount on either side of the motor. Getting the clip off is a sort of flat blade lift job but getting a new clip installed is another matter and can take some effort but can be done.
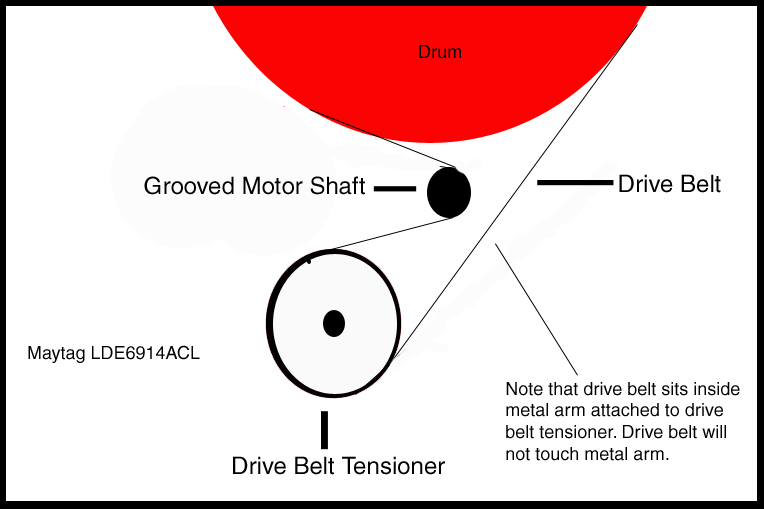
(10) So ok, I have taken the dryer pretty much apart or at least below the top controls and I have replaced the fan assembly and the drive belt. I then proceed to reinstall everything in the order I disassembled it. With the front door installed, it is time to go to the back and install the new drive belt around the front motor shaft and belt tensioner. So below you see what I saw when I took off the rear access panel and looked in at the motor, drive belt and spring loaded belt tensioner. Notice the green metal clip holding the motor to the motor mount.

(11) If you should have to replace your drive belt, below should serve as a guide for you. Yes, you will have to pull the spring loaded belt tensioner back to get the drive belt to fit over the motor shaft but it is not a big pull.
So that is it. Total cost for new fan, one of the interior heat sensors, a new drive belt and a new interior light: $80. If I have had to replace the motor, $154 locally and about $115 from Internet sources. Total time to repair? 4 hours from start to finish but you have to understand that I cleaned the dryer inside and out, oiled the motor bearings, etc. etc. etc. Should be good to go for a very long time now.