Shared Knowledge
"BMW Z3 - Replacing Valve Cover Gasket"
5 April 2016
Summary: Easy enough Do-It-Yourself (DIY) if you have tools. Gasket costs $40 but dealer will charge $300-$600 to do job for you. Suggest your replace spark plugs at same time but $100 for set of 6. Maybe 6 hour job with plenty of breaks and cleaning parts time.
Background:
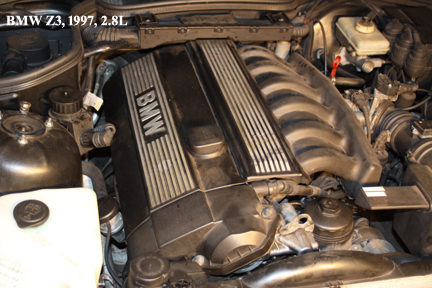
BMW Z3, 1997, 63400 Miles.
Bought new.
During recent AC recharge, notice smoke off exhaust manifold.
Valve cover gasket leaking oil down onto exhaust manifold.
Valve cover never replaced.
Tools Needed:
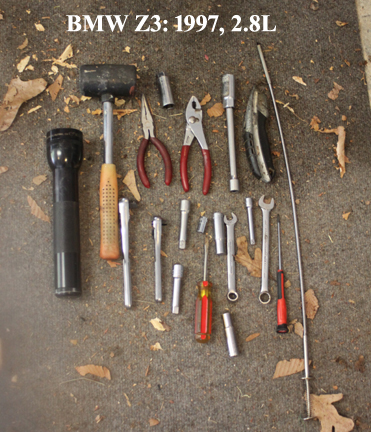
3/8inch drive ratchet.
1/4inch drive ratchet or adapter for 3/8inch drive ratchet.
(2) 3 inch long 3/8inch extensions.
1 3inch long 1/4inch extension.
10mm socket
8mm socket
10mm wrench
12mm wretch (Can't remember why right now).
Lots of light (not just flashlight), paper towels.
Nice clean box to hold all parts.
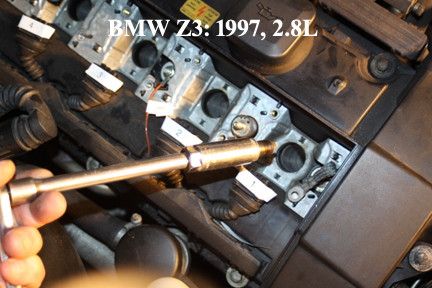
May need flexible "grabber" shown above on far right.
Need nose pliers.
Regular pliers.
Small flat blade screwdriver.
Hammer, rubber or other.
If spark plug change, 3/8 spark plug socket.
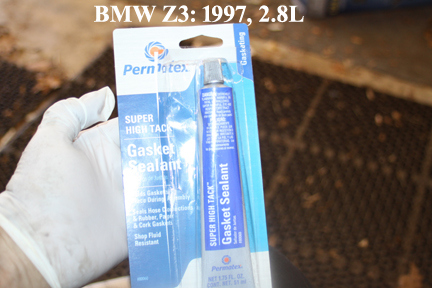
Gasket sealant.
Hand cleaner.
Remove Cosmetic Valve Covers:
There are 2 cosmetic, plastic, dust covers, over the actual valve cover. Both require use of a 10mm socket to remove.
One cover uses bolts though the cover while the other has 10mm nuts.
Removed the oil fill hole cap before removing lower cover. Replace when cover removed.
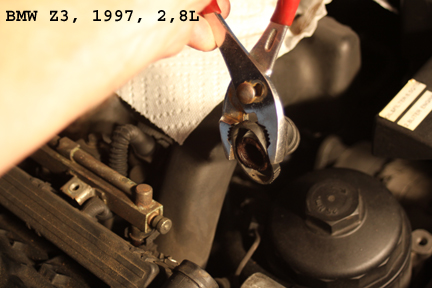
Removed host connected to upper cover. This is removed by squeezing sides of retaining ring and pulling hose backward. To squeeze enough, I had to use pliers.
When removing the lower, larger cover, lift gently as there are 4 small rubber gaskets on the top and bottom edge of the cover. These are not held in place by anything other than pressure, so they could stick to edge of actual valve cover or come loose and fall into valve cover or down into the darkness. In my case, I found only 3 of these and figured one was lost long ago and had to replace.
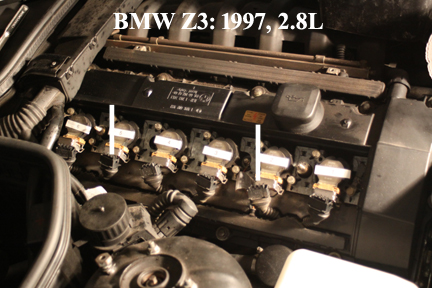
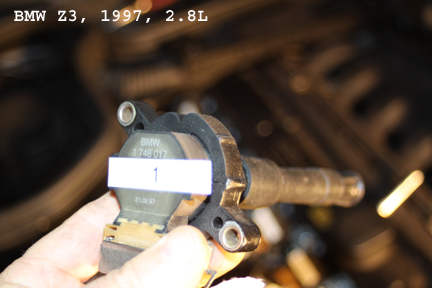
Coils:
Below shows the valve cover with a coil attached to the cover for each of the 6 cylinders.
There is an electrical connection to each coil and each coil is bolted to the valve cover by 10mm bolts.
Not required but I like to label each coil such that I replace them for the exact cylinder they came from.
The while sticker reads, from the front of the car to firewall in back, 1 through 6.
to remove the electric connector on each coil, you use a small flat blade screwdriver inserted between the metal clasp of the connector and the coil body and slowly prize up. If you look closely at each coil, you will see how the metal clip is supposed to move up and down.
Once you have metal clip all the way up, grasp the coil connector as close to the actual coil as possible and pull it straight back. Might have to use 2 hands: one to hold clip up and out of the way while the other hand pulls the wiring harness connector out of the coil.
With all coil connectors removed, begin to remove each coil from the valve cover.
Note that the valve cover is actual plastic with a metal insert to allow coils to be grounded to engine ground.
Thus there are 2 large ground straps on cylinder number 1 and 6 with a small wire on its own metal post in the middle.
With 10mm bolts removed, slowly lift, wiggle the coil out of the hole in the valve cover. The coil has a very long plastic tube as part of it with rubber at the end that fits over the actual spark plug.
Remove all coils. On coil number 6, might have problem getting ratchet and socket on 10 mm nuts because of electrical wiring box over top. Might even have to use a 10 mm wrench. Unscrewing the electrical box buys you nothing in the way of room to work.
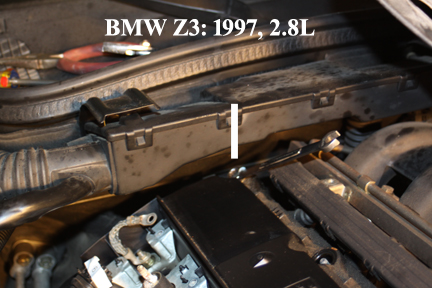
Remove coil wiring box from valve cover:
Look into valve cover, and remove the wire that comes out of coil wiring box that goes to one bolt in the center of the valve cover. 8mm socket and then 10mm socket for bolt.
At bottom of valve cover, the coil wiring box is inserted into a small gap in the cover.
To unhook this box and get it out of the way, use a small flat blade screwdriver to pry between the box and the cover while pulling up on the box. Go slowly, wiggling until you feel it to begin to move. There are 2 plastic tabs that need to move so go slowly. Once loose, lift box out of valve cover and pull up and set out of the way.
Below shows coil wiring box removed from valve cover.
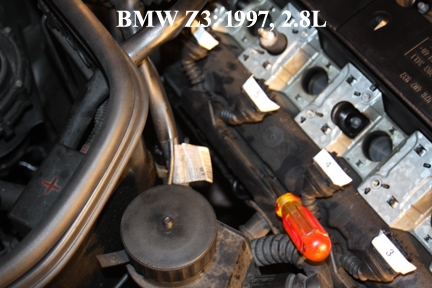
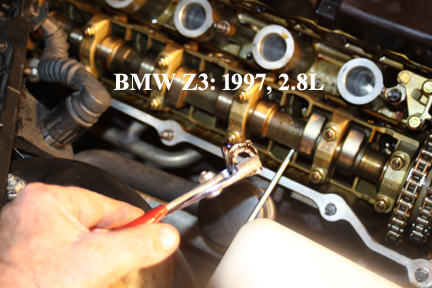
Remove valve cover bolts:
Positioned around the valve cover are 10 mm bolts.
Remove each bolt around the outside of the cover.
As you loosen each bolt and pull up, you will see it consists of a bolt, flat washer and a rubber grommet.
Not that rubber grommet may stick to edge of valve cover so make sure you get it.
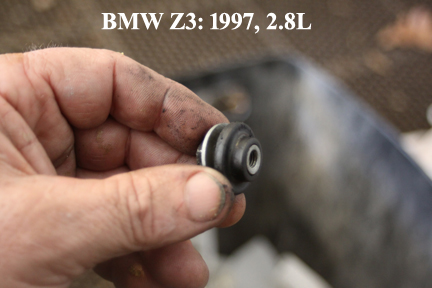
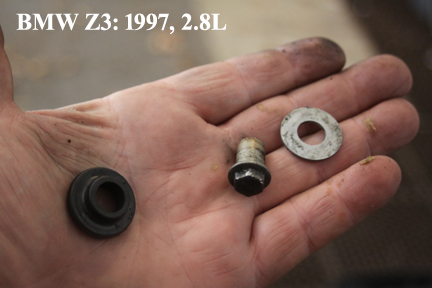
Keep bolt, washer and rubber grommet all together. During any break you take, take apart this assembly and clean thoroughly.
To remove the valve cover bolts around cylinder number 6 or under firewall wiring box, might have to use 10mm wrench instead of socket.
With all bolts removed from around the edge of the valve cover gasket, time to remove bolts in center of valve cover.
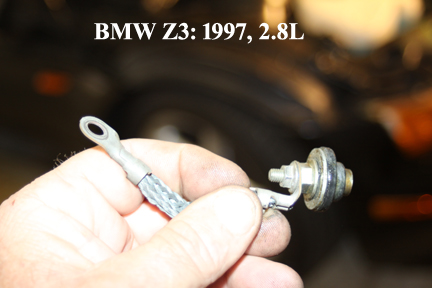
Where bolt goes through heavy ground strap, need to use 8mm deep socket to first remove ground strap nut.
With ground strap off valve cover nut, remove nut/flat washer and rubber grommet.
Remove all valve cover bolts from center of valve cover.
Now take a break and walk away.
Throw away dirty paper towels, use hand cleaner on your hands and then move your light source closer to vehicle.
Remove valve cover:
Ensure all bolts holding valve cover to head have been removed. All edge as well as those in center of cover.
Now take a hammer, rubber would be best, and slowly begin to tap on one corner while pulling upward on the oil fill cap.
Do not super whack cover. Go slow.
When valve cover begins to loosen from head, slowly lift it up, off the head.
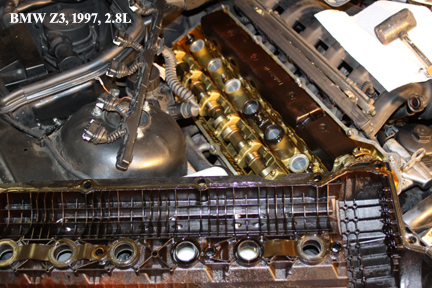
Here you must be careful as the old gasket is likely to break into pieces and some pieces fall down into the head which you do not want to happen.
With valve cover just about off, slow lift completely off and watch for any gasket coming loose.
Most likely the gaskets around the spark plug holes in the head will either stick to the head or break apart with the valve cover.
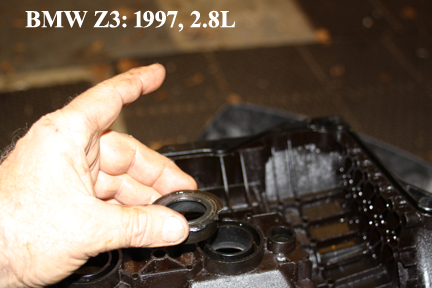
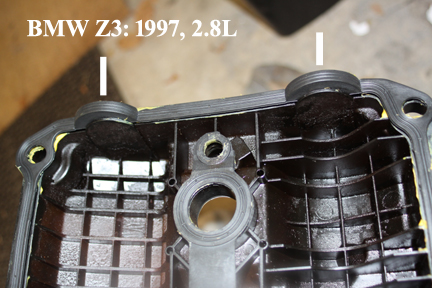
Also make sure that the 2 small rubber grommets on the top and bottom edge of the valve cover gasket are still on the gasket. If not, look in head for them or under car. I suggest you remove them from valve cover and put in box. Should be 4 of them.
In my case, a piece of the gasket around plug holes broke off and fell into head. Then had to use flashlight and my long grabber tool to get piece out of head. You do not want any sort of old gasket to be in head and potentially clog oil drain hole.
Look at the image above and note old valve cover gaskets around 6 holes in middle of cover and how some stuck to holes in head and some stuck to valve cover itself.
In my case, the gasket around the outer edge of the valve cover stayed intake except for small chucks here and there.
To remove the gasket around the outside of the cover, I used a box cutter along the edge where the gasket meets the cover's plastic and then pulled upward. The outer gasket has a rubber flange on it that fits down into a track in the plastic cover.
Go slow and pull the old gasket up and out and away from the plastic valve cover.
Amazing to me how rubber can turn so brittle over time from the heat.
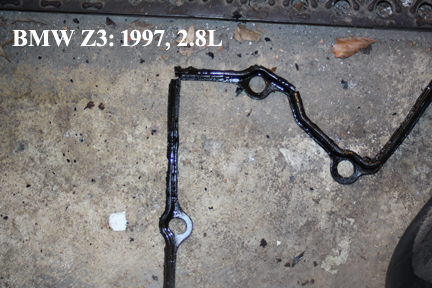
Where old gasket stuck to head,, carefully used box cutter around edge and then began to try to life, rotate, wiggle and eventually round brittle gasket came out in one hunk.
Note that gasket around spark plug holes has flanges on it that stick down into head. Make sure you get all the flange.
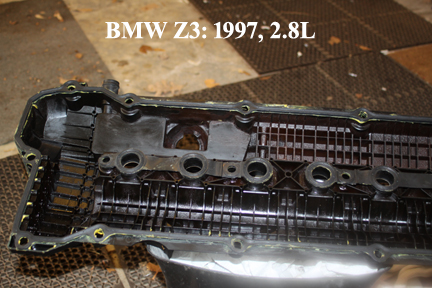
Clean:
With the valve cover off head, gasket off valve cover and all gasket removed from head, time to clean.
First use paper towels to clean around edge of head for all leaked oil. Especially around back under wiring box.
Then paper towel on edge of head that was under valve cover gasket. If any sort of gasket left or "scum" best to use fingernail as fingernail will not damage metal of head. Do not let debris of any kind fall onto, into head itself.
Clean each valve cover bolt/washer/rubber grommet with paper towel.
Clean all edges of valve cover with paper towel. Again if "scum" or residue of any kind, use fingernail to scrape clean.
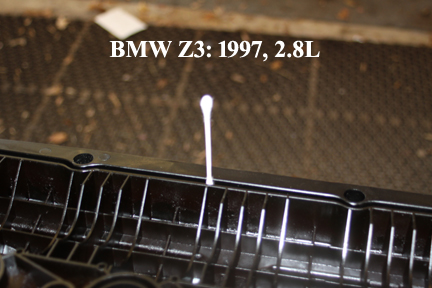
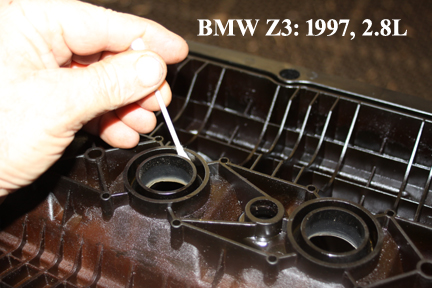
To clean gasket groove in valve cover, I used Q-tips. Q-tips also used spark plug hole grooves.
Clean inside of valve cover with paper towels. Not possible to get into ever structural groove in cover but get as much as you can.
With valve cover clean inside, groove clean, edge clean and head edge clean and around plug holes and all cover bolts/washers/rubber grommets clean, take a break, walk away.
New gasket install:
Not required but I like to use gasket sealant.
I like the super tack stuff but only apply to one edge so possible in future to remove gasket with significant effort or cleaning.
Using sealant on the outer and inner gaskets help keep the gaskets in place when you flip over to install valve cover gasket on head.
First take large, one piece gasket and position into place.
Take 2 gaskets that go around spark plug holes and determine their position in center of cover. Make sure where there is a hole in a gasket that there is a corresponding hold in the valve cover.
Now take gasket sealant and apply to gasket edge of cover. Not a lot of sealant but a thin film.
Take sealant and apply thin layer to flange on outer gasket that sticks down into groove in valve cover.
With sealant on edge of valve cover and sealant on flange, slowly insert flange of gasket into groove, moving slowly around valve cover. Gasket should fit perfectly into valve cover.
Once gasket installed into, onto, cover, with a clean hand make sure gasket is pushed fully down into groove.
Clean hands.
Now apply sealant around flanges in center gaskets and around where gaskets go around holes in valve cover.
Make sure you have them aligned correctly and place gaskets into valve cover, pushing down gaskets tight around spark plug holes.
Now find those 4 small rubber grommets that go into the edge of the valve cover. Using sealant on edge of cover, push each rubber grommet back into place. Should be 4. Also note at this time, that there is a large cut-out in the cover where the spark plug coil wires go through a large rubber gasket and that the gasket is meant to seat on either side of the cover.
With valve cover looking like above, let cover sit for as long as you can. Overnight is best.
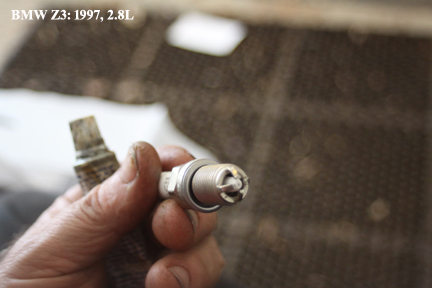
Spark plug replacement:
If you are replacing spark plugs, now is the time to do them.
You will need: a ratchet (perhaps 2 sizes); a spark plug socket and one long extension and 2 shorter ones.
Start with the number 1 plug or the one in the hole closest to the radiator.
With the spark plug socket on an extension, look down into spark plug hole in head and then guide spark plug socket over spark plug.
Once spark plug socket over plug, begin to apply counterclockwise pressure on your ratchet.
Now if the plugs have never been changed, they could be very tight. If you encounter significant resistance, back off for a while and then try again.
With the spark plug loose, you should be able to remove ratchet and remove plug by just using the extension.
Now take new plug and use a small amount of ant-seize compound on the threads. This will help the next time the spark plugs are removed.
Note that new plugs are pre-gapped so no feeler gauge required.
With spark plug out, put new plug into socket and slowly lower it into the spark plug hole.
Now, by hand only, begin to thread, seat, the new plug.
Once you have it threaded as far as you can by hand and are sure it is threaded correctly, use ratchet to draw plug tight.
I do not know recommended torque for plugs but as long as you have the snug, they should be fine.
Now move to next spark plug hole and repeat.
When you come to number 6 or the plug right under the firewall mounted wiring box, probably going to have to use one or 2 shorter extensions to get spark plug socket into hole and on spark plug.
Once all new plugs are installed, put spark plug socket on each one of them and make sure they are snug.
Install valve cover back on head.
Lift up valve cover and turn it over and give it a firm shake. If the outer edge gasket or any of the gaskets around spark plug holes comes loose, use sealant and repair. You want gaskets to stay in place as you place on head.
Make sure the gasket edge of the head is absolutely clean.
Make sure the areas around the spark plug holes in the head are absolutely clean.
Look down into spark plug holes and make sure there is not anything in there other than a spark plug.
If you see oil in the hole, you are going to have to shove paper towel down into hole to wick it out.
Once again look over head for any sort of debris and remove.
Once again, look over valve cover for excess sealant or anything else that does not below.
Now take sealant and apply a thin coat on the outer edge of the head.
Be sure to use plenty of sealant around the 2 cut outs in the head right under the firewall mounted electric box.
Also make sure all areas around head edge holes in the head are coated.
Now take valve cover and apply to gasket sealant around spark plug holes and other holes in the center gaskets. This is the flat face of gasket that is going to press down on the head.
With sealant on outer edge of head and around all holes on edge of head, take valve cover and begin to insert into engine bay such that the back goes in first and as you lower into place, make sure the large, split rubber gasket on the spark plug wiring harness fits into the cutout in the valve cover gasket.
Slowly lower the valve cover into place on the head. Again check that wiring harness is properly seated in valve cover.
Now take one of the bolts that has a washer and rubber grommet on it and insert into out edge hole of valve cover and begin to tight it down using a 10mm socket and extension. You want to start all edge bolts by hand.
With one valve cover bolt installed in cover, take another bolt and put in hole at bottom of cover at very back of head.
Begin to insert and hand tighten all other outer edge bolts.
Once all outer edge bolts are threaded into head, run your hand along edge of head and valve cover and ensure gasket has not slipped out of place and that the cutouts below the firewall mounted wiring box have the gasket fully seated.
Take 10mm socket or 10mm wrench and begin to tighten down all outer edge valve cover bolts.
Do not know torque but seems if you "bottom out" valve cover bolts, or they are snug, should be fine.
Reconnect the hose to the front of the valve cover. Should push into hole in cover and then clamp snap into place.
Now find the bolts that do into the center of the valve cover and insert and snug these.
Make sure you put back the 2 bolts that have ground wire threads on them in their proper location and that is near # 1 cyclinder and number 6. Mount bolt and then mount ground strap to it and screw down 8mm nut. Ground strap should be pointed such that lugged strap is going to fit overtop of a coil bolt.
With all valve cover bolts back in place and snug into head, best to let sit for as along as you can or overnight.
Wiring box and coils:
Take long rectangular wiring box and seat it back on outside of valve cover. If you look at box, you will see where there are plastic tabs that are going to catch in valve cover.
With coil wiring box back in place and you can not move it by hand up or out, take brown wire and attach it to the threaded valve cover bolt that sits between plug hold number 3 and 4.
Now install each spark plug coil. To do this, put the coil over the hole oriened to holes in edge of coil align with holes in head and begin to lower coil prong into hole. Move coil around until you are sure it is properly seated over the plug. As the end of the spark plug prong is rubber, there will be some looseness until the coil bolts are inserted and tightened down.
Remember with number 1 and number six coils to install ground strap under one of the coil bolts
With all coils back in place and bolted down snuggly, insert spark plug connector into coil connector. You are going to need to hold the metal clip, latch, on the coil connector up until you have inserted the coil cable connector into the coil connector.
Once the coil cable connector is fully into the coil connector, push down on the metal tab such that it locks back into place.
Give the coil cable a slight tug and it should not move out of coil connector.
Repeat for all other coils.
Time to break.
Finish:
Now check everything over: all valve cover outer edge bolts in place and snug?; all coils installed correctly with ground straps and bolts tight or snug?; nothing in valve cover that does not belong there?
Now take cosmetic, plastic valve cover, covers and reinstall. Again 10mm nuts or bolts.
Using paper towels wipe down all surfaces, edges.
Step away from car and then cover back and check for tools, paper towels and anything that does not look right.
Car startup:
When I started the Z3 for the first time after valve cover gasket and spark plug replacement, it ran a little rough for 5. 10 or 15 seconds but not much more than any cold start.
Now let engine run and watched temperature gauge.
Once temperature got up to engine normal, watched under hood and "yes" did see some smoke.
Here, I jacked up car and removed right front tire to get a good look and it appeared that oil was coming out of one of the exhaust manifold bolts but that made no sense so let oil burn off exhaust manifold.
I repeated dead cold to normal temperature for several days and each day the amount of smoke coming from under engine was less and less until finally no smoke at all. Theory is that oil leaking from valve cover "wicked" into exhaust manifold gaskets and took a while for all leaked oil to burn off.