
Shared Knowledge
"Tivo - How to: Replace the Power Supply"
8 February 2011
Summary: Easy enough do-it-yourself (DIY) for anyone with some personal computer (PC) hardware experience.
Background:
Tivo series 2, TCD24004a.
Lifetime Tivo service.
DIY upgraded hard drive (a year or more ago and not the problem).
One day, green light out on front and nothing on attached TV screen. Dead Tivo.
Fan turns.
When removed from outlet power and then plugged back in, green light on front of Tivo turns on for 1 second and then turns off.
First steps:
Unplug Tivo and take to work bench.
Remove top cover.
Remove and reconnect hard drive power supply cable. Plug in Tivo to wall outlet: no change in front panel light.
Unplug Tivo from wall outlet and remove hard drive power supply cable and use voltmeter. +12 and +5 volts direct current (DC) volts present. May not be insufficient current but voltage ok. Also aware that power supply provides other voltages to motherboard and these I have no way to measure (3.3VDC?).
When hard drive power supply cable removed from hard drive, no change in Tivo front panel light.
Remove hard drive and hook to personal computer (PC). As Tivo runs special Unix-based application, can not look into hard drive with Microsoft Windows-based PC but at PC BIOS level, can see Tivo hard drive at least alive. Must assume ok at this point. Reinstall hard drive back into Tivo.
Remove and reseat ribbon cable between power supply and Tivo motherboard. When Tivo plugged into wall outlet: no change in front panel light.
At this point, either hard drive (don't think so), motherboard (maybe but not likely), power supply or some completely unknown problem.
Because of lifetime service, take a chance on replacing power supply.
Tivo does not sell Tivo parts like hard drives or power supplies.
Look on eBay and many, many, different power supplies for many, many models of Tivo, but none for my specific model TCD24004a and do not know real differences between Tivo models but suspect I best off with power supply for my specific model.
In the end, buy a complete Tivo Series 2, TCD24004a that is supposedly in working order but no lifetime subscription. Cost is $50 to include shipping.
FYI:
If your Tivo is dead, dead, meaning no front panel lights and fan is not turning with Tivo plugged into wall power, you might have a blown fuse on the Tivo power supply board.
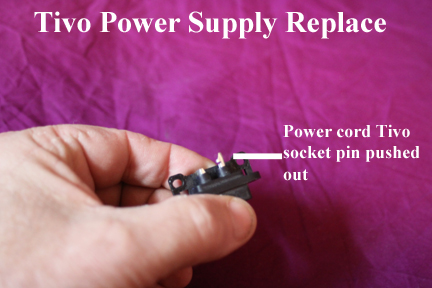
When I examined power supply before removal, I noted that one pin of power socket was pushed out of power connector. In my case, was not the problem as I fan turning and correct voltages on hard disk drive connector but you may want to check this. If your Tivo, dead, dead, might be it not getting power right at this connector. Note: connector removed to better show pin sticking out of connector.
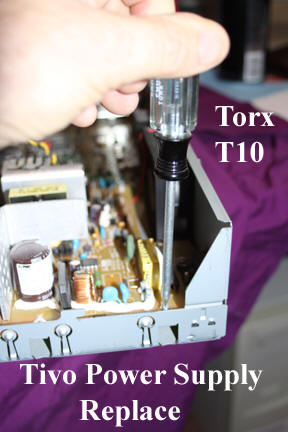
Tools and supplies:
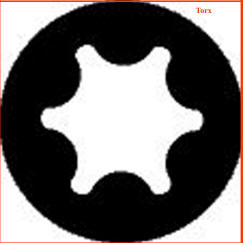
T10 torx screwdriver. A trox screws is not a Phillips or flat blade and do not try to use these to remove torx screws.
Needle nose pliers.
Can of compressed air to blow out inside of Tivo since you have top cover off.
Replacement power supply for your specific model of Tivo. Power supply by itself may be available on eBay or you might have to buy a complete Tivo of the same model as yours and use for parts.
How to Replace Power Supply:
First, when it comes to electrical, be safe. Never work on Tivo with power cord plugged into wall.
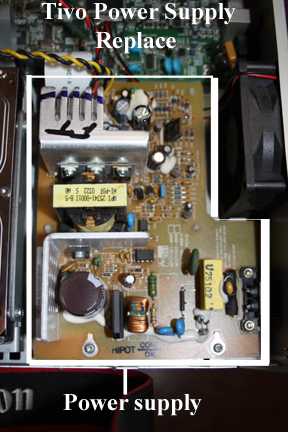
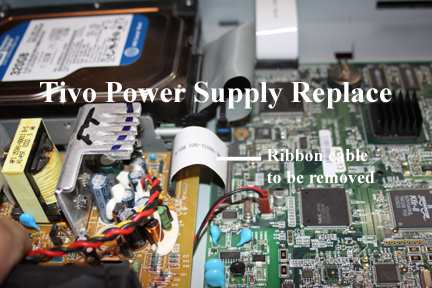
Tivo power supply is the circuit board outlined in white below
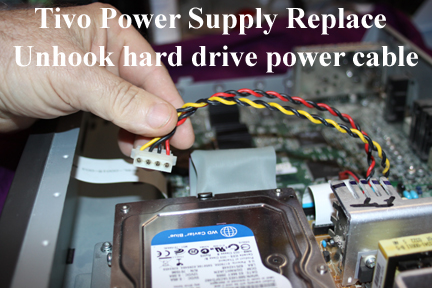
Unhook cable from power supply to hard disk drive.
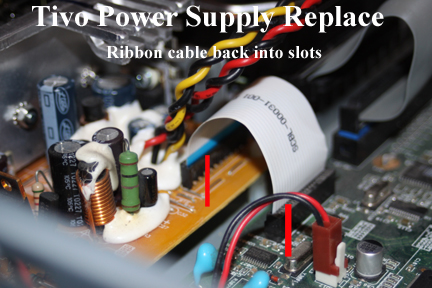
There is a "ribbon" cable between the power supply and the motherboard that will have to be removed.
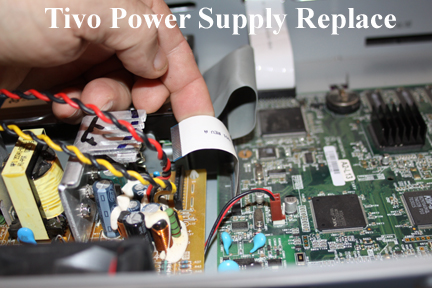
The ribbon cable ends are pushed down into a slot in a connector on the power supply and the motherboard. Using your fingers to pry the cable out carefully.
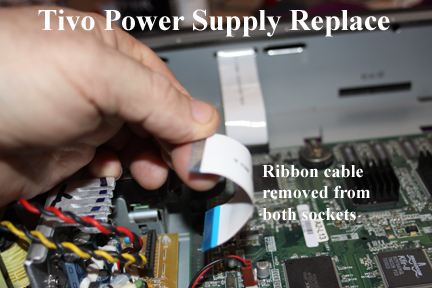
Ribbon cable completely removed.
The power supply board is mounted in the chassis by 2 torx screws and then pushed down over 4 fiber standoffs.
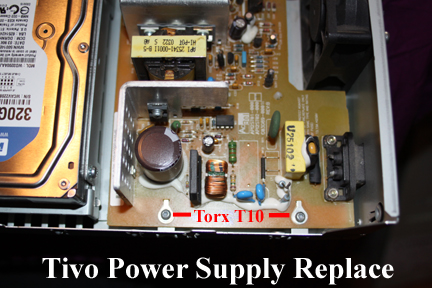
Remove 2 torx screws with T10 screwdriver. Note that on my system, these screws were longer than those used to hold top cover to chassis.
I do not have a good picture of it but there are 3 fiber standoffs that have to be dealt with. What you have to do is to place some fingers under the board and apply upward pressure while you use needle nose pliers to squeeze tabs on the top of the standoff together such that the standoff will slide down into the hole or the board will slide up off the standoff. I had success squeezing the front top and then front bottom and finally standoff on backside, middle of the board. Once the board is free of the fiber standoff's it can be lifted up and out of the Tivo.
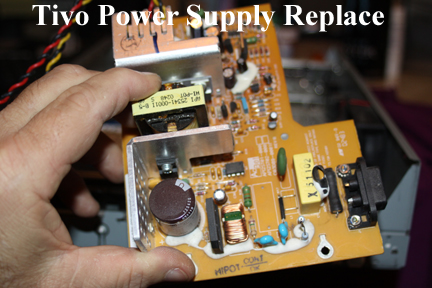
When I removed the power supply board from the Tivo, noticed one fiber standoff still stuck to board and assumed I must have broken it removing board but now convinced this standoff not really attached to chassis.

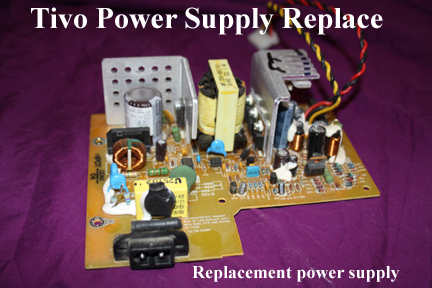
If you bought just a power supply, you are ready to install it into the chassis.
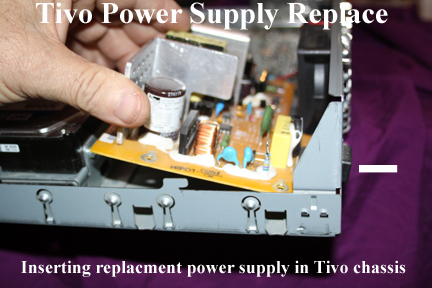
To install the replacement power supply, you first set the power cord connector into the slot in the chassis back and then lower the power supply into the chassis. As it lowers, it will hit the fiber standoffs. You align the fiber standoffs with the corresponding holes in the power supply board and push the board down over the standoffs. Make sure you get the board down over all standoffs. The board will have "play" or move some until you screw it down tight with the T10 torx screws.
With 2 screws holding power supply to chassis of Tivo back in place, time to reinstall the ribbon cable between the power supply and the motherboard. Start at the power supply side and align the cable with the slot in the connector and gently push the ribbon cable back into the slot. You should only apply pressure right on the cable right at the connector. The ribbon cable needs to go down into the connector to the depth of the blue line shown below. Once the power supply end of the ribbon cable is reattached, push the other end of the ribbon cable into the slot in the connector on the motherboard. Again, only apply firm steady pressure on the cable right at the connector.
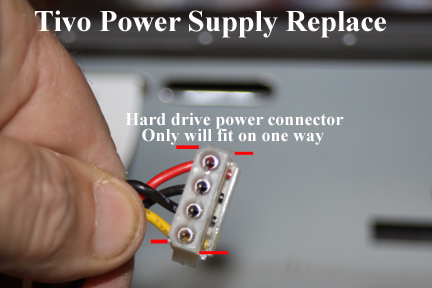
Reconnect the hard drive power supply cable to the hard drive installed. The power supply connector is "keyed" and can only be installed one way on the hard drive. If when you try to install the connector on the hard drive, you meet significant resistance or the "mounted" connector easily falls off, you do not have the cable keyed properly to the hard drive.
Check everything over. Power supply mounted tight to chassis and on standoffs? Ribbon cable pushed down in connector slots at both ends? Power cable from power supply on hard drive correctly?
If all looks right, reconnect power chord to Tivo and plug power cord into wall outlet.
Here is hoping the green light on the front of the Tivo lights. It did for me.!
If the Tivo still appears dead after a power supply swap and front green light is still not on, then could be hard drive or motherboard or even front light panel circuit board.