"Tivo - How to: Remove and Reinstall Tivo Top Cover"
9 February 2011
Summary: taking the top cover off your Tivo voids Tivo hardware warranty (only for 90 days from purchase date anyway) but necessary for do-it-yourself (DIY) hard drive upgrade\replace or power supply replacement. Removal is easy but reinstall requires sides alignment.
Tools and supplies needed:
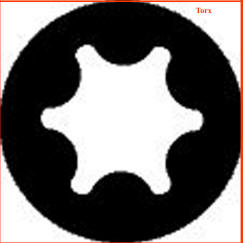
T10 torx screw driver. Torx screws are not Phillips or flat blade and do not try to use these to remove torx screws.
Can of compressed air.
To remove Tivo top cover:
Remove the 5 T10 torx screws holding the top cover to the chassis. Screws loosen in a counterclockwise rotation.
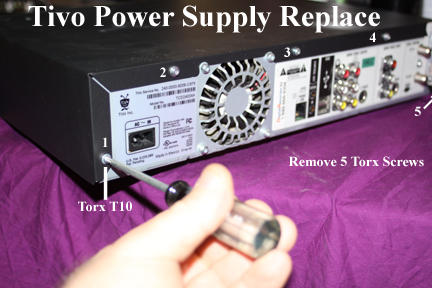
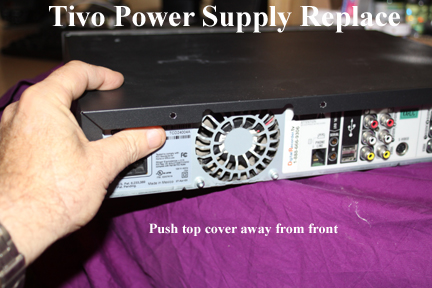
With all torx screws removed, push/pull the top cover back towards you, off the chassis.
Anytime you have the Tivo top cover off, use the opportunity to remove dust and dirt via a can of compressed air. Especially pay attention to the fan that can become clogged.
To reinstall the Tivo top cover:
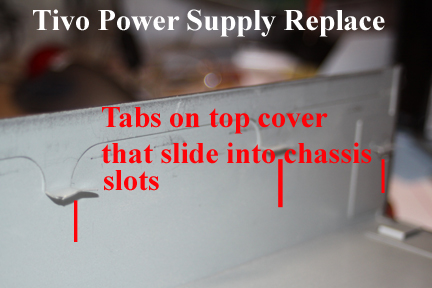
On the sides of the Tivo chassis, are 2 tabs that have to lock with tabs on the top cover.
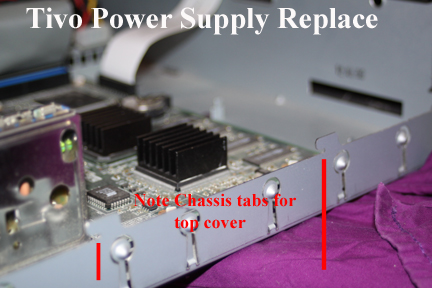
Tivo top cover also has tabs that lock into chassis tabs
All tabs should be straight or not bent out of shape. Straighten with pliers if needed.
Top cover being reinstalled on Tivo Chassis
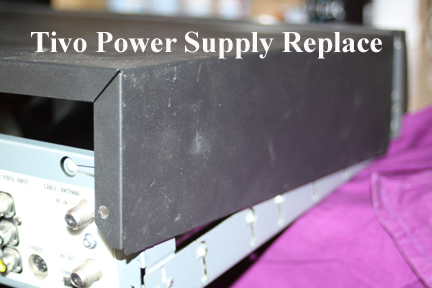
Cover, top front, should mate perfectly with Tivo front face. If not, side tabs on chassis are not properly seated in top tabs.
Push top cover completely onto chassis with top cover aligning with holes in chassis for torx screws.
Reinstall all 5 torx screws. Start screws threading by hand. Torx screws tight in clockwise direction.