Shared Knowledge
"Hydronic Heating System - Replacing Pilot Light Ignitor"
4 January 2018
Summary: the actual pilot light ignitor or sparker located near the pilot light natural gas port in the furnace rarely causes problems but sometimes it must be replaced. Do-It-Yourself, if you are handy.
Background:
This article is in reference to Utica Boiler Model A100AGB1.
My furnace is a Utica model MGB 1502I.
Certainly there will be differences between make and model of gas fired baseboard heating systems but what is here should help with most furnaces.
All credit for this article goes to “Guy in Chicago”.
Modern gas furnaces have automatic pilot lighting systems.
Automatic pilot light systems include the furnace control box, a "spark voltage generator" and an actual small metal road that is mounted in furnace such that the very end of it is in the pilot light gas stream and sparks to ignite pilot light.
Remember all furnace metal is electrical ground and you only want sparks right at the pilot light gas port inside the unit.
The actual element that "sparks" is simply a short round, metal, rod that is insulated mounted to furnace and is connected to "spark creation unit".
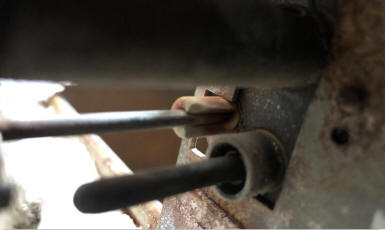
It is rare that actual ignitor element goes bad but as shown in the above, if the ceramic insulation around the metal rod breaks or cracks, the rod could spark where it is mounted instead of in the gas stream like it is supposed to.
As it is rare that the actual ignitor goes bad, make sure it is what is actually causing ignition problem before attempting to replace.
The best way to check is to remove any furnace sheet metal such that you can see into furnace and determine if there are any sparks and where it is sparking.
If you going to replace ignitor, best to get ignitor made specifically for your make and model furnace and acquire before you begin replacement effort.
As manufacturers change the design of a specific part all the time, make sure you buy any required additional parts, like red cable.
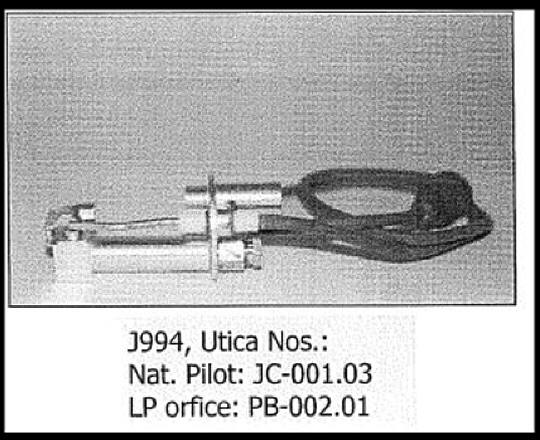
In my case, review of owner manual showed part number of ignitor assembly to be PB-001.02
A search of the Internet revealed multiple sources for the defined part.
The image below is for the ignitor assembly for my model Utica furnace.
How to Replace the Ignitor:
Shut all power off to furnace.
Shut down all natural gas to furnace.
Remove furnace sheet metal so you can see and get to where ignitor is located.

The ignitor is the one with the red electrical wire connected to it.
Also in this location is the flame sensor that allows full furnace burner ignition after the pilot light has been burning for some period of time.
Also at this location is pilot light natural gas input line.
So to get at the ignitor, you must uncouple the pilot line natural gas line and also remove the flame sensor. Both can be removed with a wrench.
Once flame sensor and natural gas pilot lines have been disconnected, remove 2 screws holding mounting plate to furnace and slowly pull the entire unit out of the furnace.
If you have a complete, new, ignitor, assembly install to mounting plate.
If you do not have an identical ignitor assembly, going to have to remove the ignitor rod from the mounting plate.
The image below shows the entire mounting plate removed from the furance.
As can be seen, this ignitor is "glued" into the mounting plate hole and you going to have to get it out anyway you can and leave a clean mounting hole.

In this particular case, "Guy in Chicago" did not have an identical ignitor assembly replacement and bought just an ignitor rod to use.
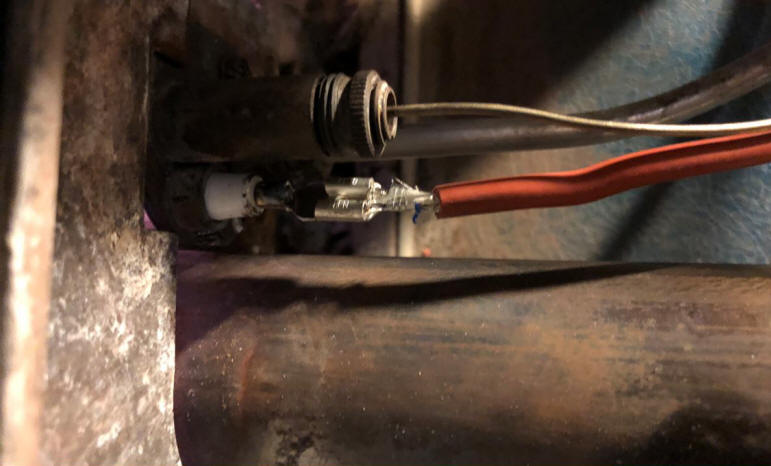
The image below shows ignitor road in mounting plate.
Also note that instead of "gluing" the rod into the mounting plate hole, he found the mounting plate had a set screw hole and used that instead.

Unfortunately, after the ignitor rod was installed and mounting plate placed back on furnace, became obvious that new ignitor rod did not stick out the back of furnace enough to allow the red wire to have a new connector and a rubber boot fit over all without the possibility that the ignitor would spark to the metal of the flame sensor tube, so the initial ignitor rod would not work.
Again, there is nothing special about the actual ignitor rod other than it is insulated where it mounts to furnace and that it is long enough insulated section to be in pilot light gas stream.
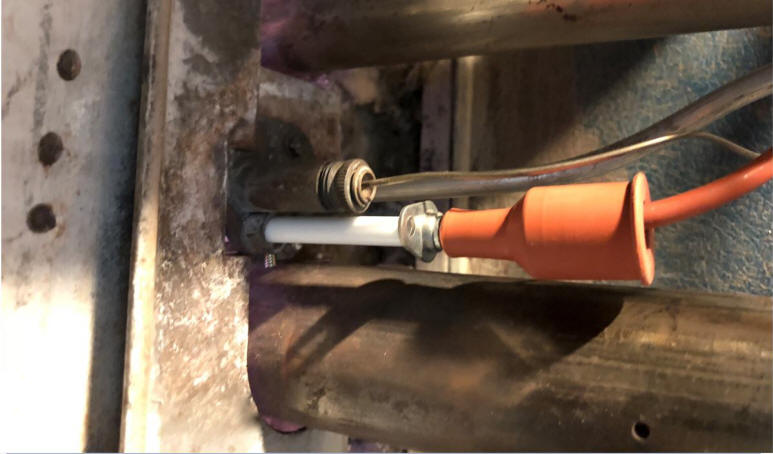
As replacement for ignitor first bought that would not work, "Guy in Chicago" bought a "flame sensor" that had a long enough insulated section and was insulated at mount point and fit into mounting plate hole.
However, the length of the rod inside the furnace was too long to end right in the pilot light gas flow stream, so he had to cut the rod. In his case, he used a grinder and warns that you do not want to bend the rod while grinding or cutting with a hack saw or other.
Image below shows "flame sensor" ignitor installed in furnace mount.
Finally to summarize: be sure ignitor assembly really is your problem before replacing. When you try to fire up furnace, if you see sparks anywhere other than at end of ignitor in natural gas stream, then replace ignitor. There is nothing special about ignitor other than metal rod must be long enough to be in pilot light gas flow and be fully insulated from furnace electrical ground where mounted to furnace.
Always best to use the exactly part number replacement.
Once you have new ignitor installed and have double and triple checked your work, turn the gas back on to the furnace, turn on the power and fire up the furnace. You should be able to see sparks at the end of the ignitor, the pilot light catch fire and after a short time, all burners ignite.
As with any DIY project, there can be challenges outside what has been described above, like screws holding small round plate to furnace being "Frozen" in place or you strip a screw or the ignitor you bought is not long enough or, or, or.
Understand that being without heat when it is 0F is no fun and the pressure is on you to get it fixed quick, but be careful, go slowly, walk away from your work at any time and relax and then get back to it. Although the ignitor voltage is high (25,000 volts direct current) and would not kill you, you are working with natural gas and so always danger of explosion.
If you have read this far and still think you can do it, then you can.
Finally thanks again to "Guy in Chicago" for actually doing all the work and providing the images included here.
If we share, we all save time and money.
Click here for more home hydronic heating system.