![]()
![]()
![]()
![]()
![]()
![]()
Ron Stultz
![]()
![]()
"Home Electrical Wiring - Mechanically Wiring Outlets and Switches"
Summary: there are many websites explaining\showing how to wire outlets and switches electrically but they ignore the mechanical aspect of wiring. Here I explain\show how wires are mechancially attached to outlets and switches.
Tools and supplies:
- Very sharp knife or insulation strip tool.
- Wire cutters.
- Needle nose pliers
- Phillips screwdriver.
- Voltmeter. If you are going to do electrical, you must own a voltmeter. No ifs, ands or buts.
- New outlet or switch box. Use plastic boxes, not metal.
New outlet or switch box:
New outlet and switch boxes can be bought that are metal or plastic. I suggest you do not use metal. With metal there is always a chance that a nicked wire will come in contact with the electrically grounded side of the metal box or that a electrical wire cap will come off and an exposed twisted wire bundle make contact with the electrical ground of the metal box. Unless you must use a metal box, such as in a watertight situation or other, use plastic.
There are many variations of plastic and metal outlet and switch boxes available: depth, number of gangs or outlets and switches that can be installed, etc.
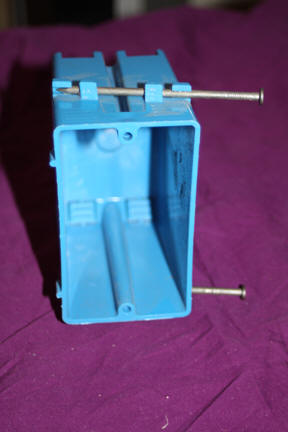
Plastic and metal boxes come in deep (below) or shallow depths.
Plastic box for installations in existing drywall. Screw on front draws a drywall wing up and tight to drywall in the back.
.jpg)
.jpg)
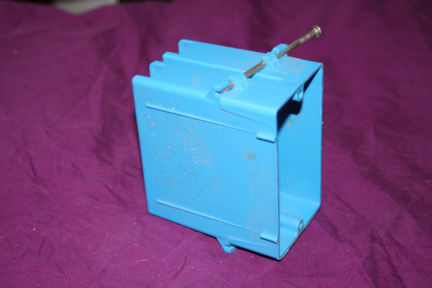
Another plastic box variation available for insertion into existing drywall.
.jpg)
Cabling: When either cabling for new or updating old, leave plenty of cable to go into box. By this I mean, when cable inserted into box, at least one foot of cable should be free to use to connect outlets and switches. If you skimp on cable inside the box, you will only complicate outlet and switch wiring and mounting.
Prepare switch or outlet box before mounting. Where you intend to insert cables into box, use a screw driver to pre-stress the cable tabs that are part of the box. If you do not do this, insertion of cables(s) can be difficult or downright impossible depending on box location. To help keep cables straight inside the box, as which cable goes to what, route the power-in cable in one box hole and light cables in other hole.
.jpg)
.jpg)
.jpg)
.jpg)
Mount box:
No drywall in place: If you do not intend to drywall, there is no concern on mounting of the box but if drywall is coming, you need to position the box along the wall studs such that the box is mounted so that the small plastic edge ridges built-in to the box are only 1\8 inch beyond the leading edge of the wall stud. If you ignore box placement, when you drywall, the electrical box will be too recessed into the wall. If you simply use the ridges built-into the box, the front edge of the box will be the thickness of the drywall recessed. Once box mounted, route cables into box. Leave plenty of cable sticking out of box.
If drywall already in place: Place box you going to use at intended box location and using a pencil, outline the box (top of pencil mark should be at same height from floor as all over outlet or switch boxes in the same room). Using a box cutter knife or drywall saw, cut out drywall inside pencil box outline. Once hole created, position box to see if it will slide into hole. If box will not go into hole, slowly trim sides and bottom as needed. Test box in hole often. Do not force or jam box into hole. Once box will go into hole, insert cable(s) into cable clamp holes on back of box and then insert box into hole and use front screws to draw box tight against drywall. Note that it is possible to loosen screws on box and remove it but better to get it right the first time.
Strip off outer cable sheath of cables inside the box. Make a mental note of the purpose of each cable in the box (power-in, light (1), light (2), power out, etc. If it will work for your installation, insert one cable into box at a time and work with it before inserting another cable into the box. At a minimum, place a piece of masking tape or an actual label on the power-in black (hot) wire. Note: always use a very sharp knife when working with electrical. There is no quicker way to cut yourself or nick a cable than by using a dull knife or strip instrument. Start at the very end of the cable and make a cut along the bare copper ground wire that should be in the middle of the cable. Then pull one side the insulation away from the ground wire center. This will expose at least one of the 2 other wires. Be carful. Do not nick any wire.
.JPG)
Outlets and Switches
Note: if you are going to work on an existing box either replacing or adding an outlet or switch, at your circuit breaker panel, cut all power to every outlet or switch located in the box you are working on. Once you think you have cut power to the box you are going to work on, test all switches and outlets to make sure they are dead. I have some boxes that actually are controlled by 2 different circuit breaker panel breakers.
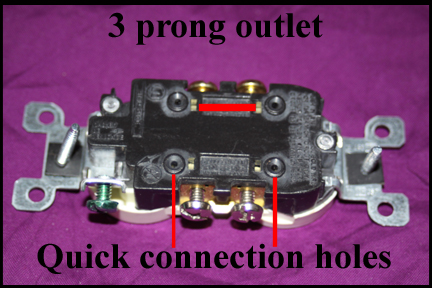
New outlets and switches have a quick connect feature. The idea is that stripped wires are inserted into holes in the back of the outlet or switch and "teeth" built into the switch at the site of the hole, make electrical contact and also keep the stripped wire from being pulled out. Do not use quick connect holes. It has been my experience that some outlet and switch quick connect "teeth" just will not hold stripped wires tight enough to prevent them from coming loose when the outlet or switch is pushed back into the outlet or switch box for mounting.
If you are working on an old installation and outlet or switch was wired using quick connect holes, you will find a very small slot next to each hole. If you place a very small flat blade screw driver in this hole and push down while pulling out on the wire in that hole, the wire should come out.
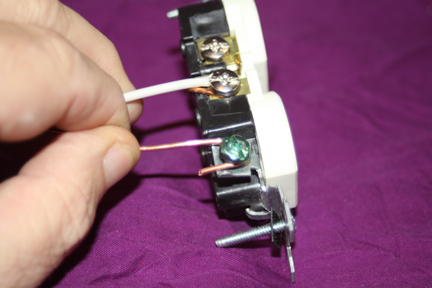
Connect white wire:
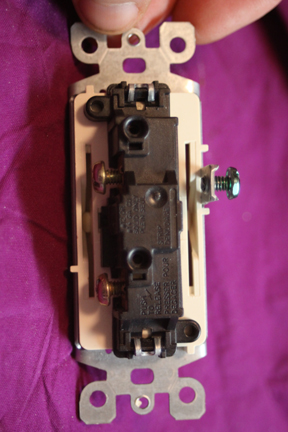
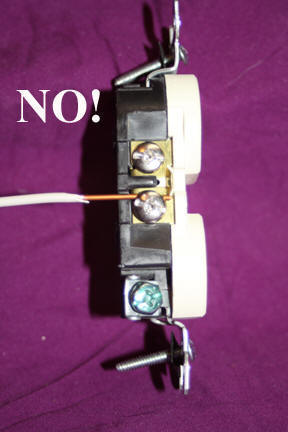
Below shows the absolute wrong way to wire an outlet or switch. The outlet or switch terminal is not intended to provide structural support for the wire and there is bare wire sticking out behind the wire that could easily touch a ground wire or other wire in the same outlet box.
Strip 1 inch of insulation off white wire. Using needle nose pliers, form a loop on stripped end of white wire. Looking at outlet, find the side marked for the white wire. Unscrew one of the terminals on the white wire side all the way out. Wrap the white wire loop under and around the white wire terminal screw on the outlet. You want the wire to wrap under and around the terminal screw in a clockwise direction
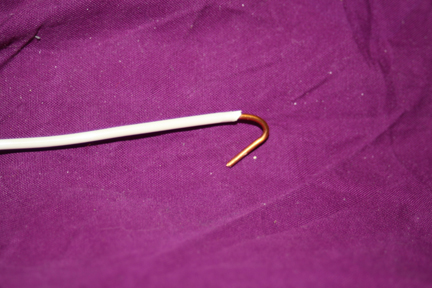
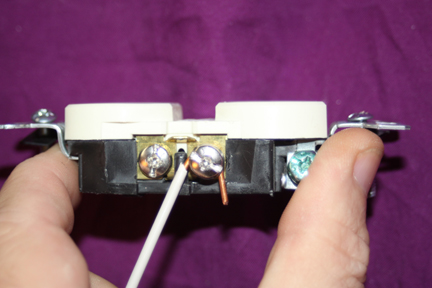
With white wire under and around terminal, use needle nose pliers to squeeze wire loop closed.
Tighten screw terminal down tight. If other terminal screw on same side is not needed, screw it down tight.
Cut off excess wire. Do not want bare wire to extend beyond outlet.
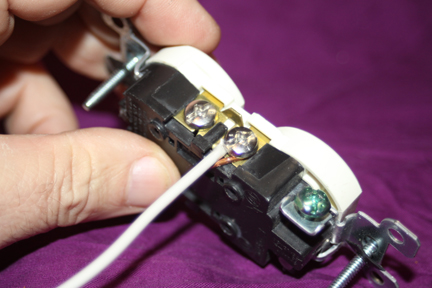
Connect ground wire. Using bare ground wire, form loop on end and wrap under and around green ground terminal
Close wire loop with pliers and tighten screw.
Once again, cut off any excess wire.
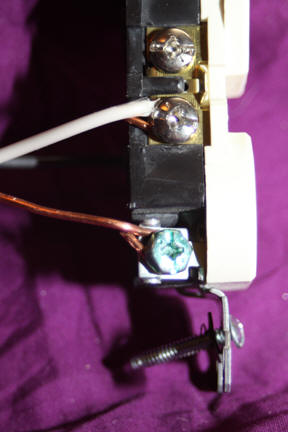
Connect black wire. As before, make a loop on the stripped end of the black wire. Wrap it under and around the black wire side of the outlet in a clockwise direction. Close loop with pliers and tighten screw. Cut off any excess wire.
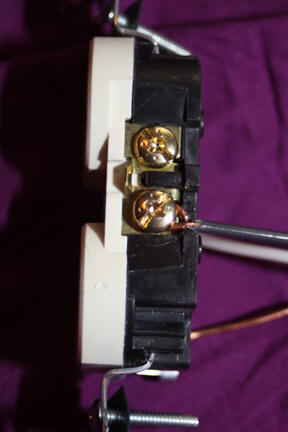
Screw in tight all screws. If you do use the quick connect holes in the back of the switch or outlet: (1) make sure there is no bare wire sticking out of the hole and (2) at least tighten down all screws on the side of the outlet or switch such that the screws do not stick out. When you push all wires and the outlet or switch back into the box, you do not want a ground wire to accidently come in contact with a screw stuck out in the open.
.jpg)
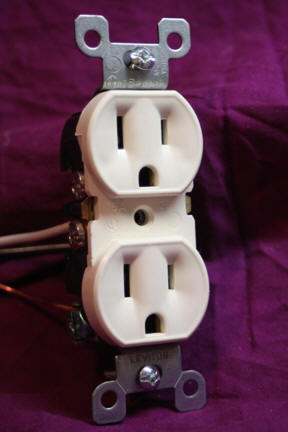
Outlet and switch mounting:
Mount outlet(s) in box in accordance with what is normal in your home. I like to mount outlets with ground prone at the bottom
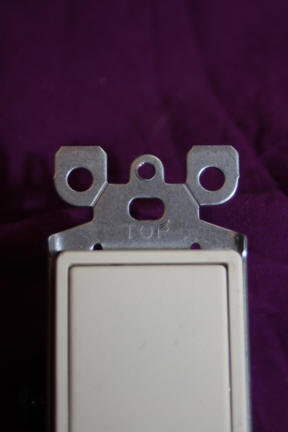
Most switches have "Top" stamped into the metal of their mounting plate. Mount switches that have a direction with "Top" at the top of the box.
Push the outlet or switch back into the box and attach outlet or switch to box. In a box with only one outlet or switch, getting the wire of a new outlet or switch back into the box so that the switch or outlet is flush with the box for mounting is not usually a great problem. But some existing outlet or switch boxes have multiple wires, outlets or switches and getting a replacement or new add switch or outlet back into the box can take some careful effort. If you have a full box, take a look inside the box before you try to push an outlet or switch back into it. Are there any large cable connectors in the way? Can these connectors be pushed up or out of the way? Is there a ground wire tangle in the way? Can the ground wire junction be pushed one way or the other? When you think you have a clear path for the new or replacement outlet or switch, try pushing it back into the box. Now some boxes are mounted poorly inside the wall to wall stud and so be careful pushing backward as the whole box may move on you.
Multiple outlets or switches box wiring:
When there is more than one switch or outlet in the same box, wiring becomes a little more complicated but not really. Basically the power-in cable black must go to each outlet and each switch and the power-in cable white must go to each outlet. In general, all white wires in a box are connected together. This means the power-in white wire, white wires to outlets and the white wire of a light circuit.
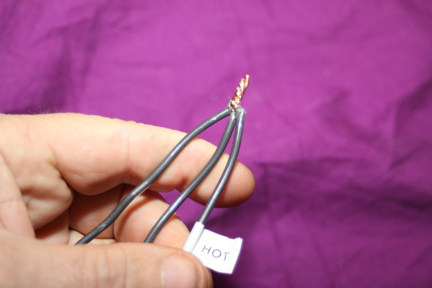
Take all white wires in box and twist together in clockwise direction.
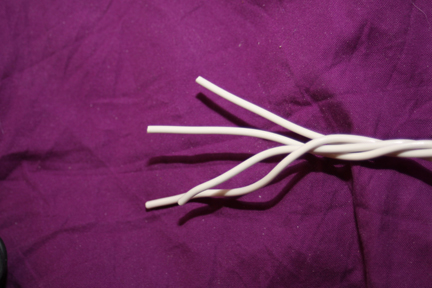
Using wire cutters, even ends of all wires in white bundle
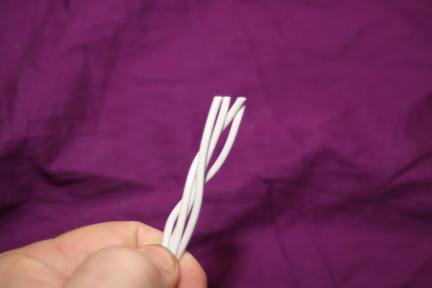
Strip insulation of ends of white wire bundle.

Twist stripped wires together in clockwise direction and then trim evenly.
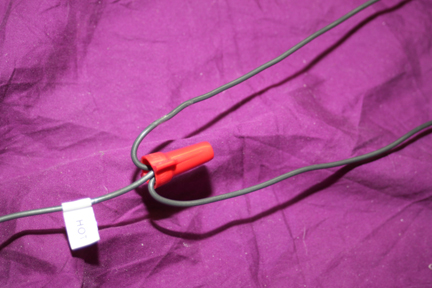
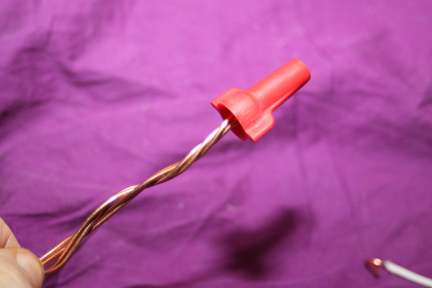
Cap off white wire bundle with appropriate size wire cap. Wire cap twists on bundle in clockwise direction. When cap fully on tight, no bare white wire should extend beyond cap.
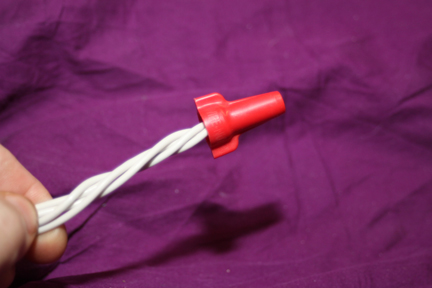
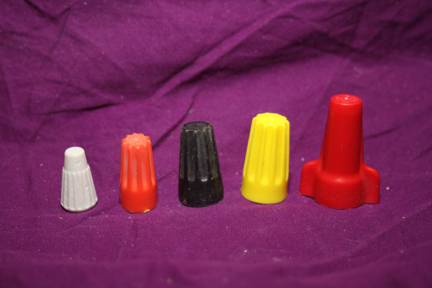
Wire caps come in various sizes. Below are the most common sizes but smaller and larger are available. Always use the appropriate size cap for the bundle, wire junction you are using the cap on. You do not want the cap to come off when you push wires back into the box.
In general, the power-in cable black must be connected to outlets and switches. One way to do this is to form a black wire bundle with black wires going from the bundle to each outlet or switch. A black wire bundle is created similar to the white wire bundle shown above.
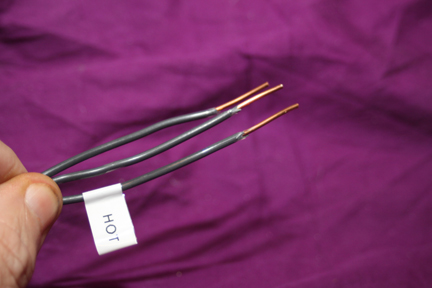
Below shows how black wire bundle used to connect outlets and switches. Tag on one black wire is the power-in cable black or hot wire.
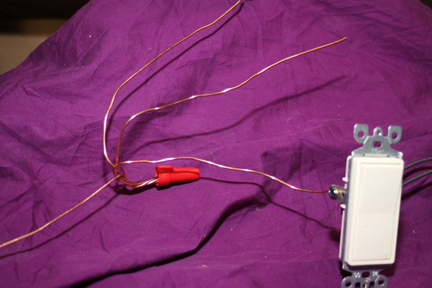
Ground wire bundle.
Ground wires going from cable-in ground wire to all outlets and switches in box.
Shows ground wire bundle wire going to switch.
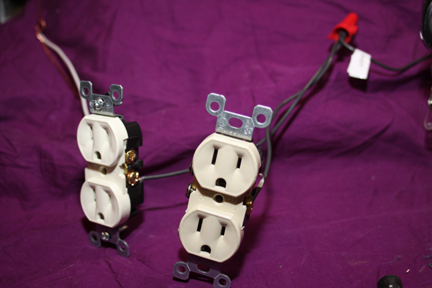
2 Outlets where power-in on one is wired to second outlet.

Another way to wire 2 outlets where "hot" is supplied to each from a black wire going to black wire bundle. Tag on one black wire indicates it is the power-in black wire or hot
In summary then:
Don't use metal boxes.
Make sure all circuits are dead.
Leave plenty of cable inside the box to work with.
Do not use the quick connect holes on the back of the switch or outlet.
Make sure to observe polarity when attaching the black and white wire to an outlet.
Use pliers to close the loop of any wire around a screw. The screw is not intended to be a mechanical support.
Screw in tight all screws so they do not stick out.
Carefully push the outlet or switch back into the box and if required, move some wires in behind the intended location to make room.
If you are wiring a switch box with multiple switches, make sure to electric tape over and around each wire cap. When you try to fit all wires into box, might easily pop-off a wire cap if not taped on.