Shared Knowledge
"HVAC: Forced Hot Air - Powered Dampers"
9 January2019
Summary: Powered dampers are not difficult to install or repair do-it-yourself (DIY) but you must adjust motor and damper for proper opening and closing.
Background:
Moved into a house with forced hot air heat.
3 Zones means furnace feeding 3 different flexible duct runs in attic.
3 Zones meaning a each zone had a return duct to the furnace.
3 Zones meaning 3 thermostats.
3 Zones meaning a 2 of the zones had powered dampers in their output line that powered closed when the thermostat for that zone was not calling for heat.
When I moved in, the 2 secondary zones did not have powered dampers in their returns, thus when main thermostat called for heat, cold air was sucked from the space of all zones.
To fix returns not having powered dampers that closed when zone was not calling for heat, I paid a HVAC company to install dampers.
After powered damper install all done, I signed off on work too soon and found I had trouble getting heat to zones properly.
After install, the damper on one zone's return line never opened.
So rather than call back HVAC company, I decided to investigate, repair or fix myself.
Powered Dampers:
24 Volts alternating current (VAC). Perhaps there are much, much older dampers (120VAC??) in service in some homes but 24VAC powered dampers are in my home.
Note: if you are going to work on a powered damper, make sure whatever controls the damper is powered off. 24VAC is not going to hurt you if you touch bare wires but if you short out wires, could blow a fuse on whatever control board is being used or even damage the 24VAC transformer that is somewhere in your system.
A damper is a sheet metal flap installed in a sheet metal round or square fixture to which a 24VAC motor is attached.
When the motor of a damper is powered, it can either open the valve inside or close it. Most dampers installed in forced air systems are normally open (NO), powered close types but normally closed, powered open, are also available.
Because motors do go bad, motors are replaceable but because how a motor attaches to shaft of valve and mounts to sheet metal of damper housing varies from manufacturer and even over time from same manufacturer, if you are replacing a damper motor, have to determine how motor is mounted to duct and how motor is connected to valve shaft and get a replacement motor that matches configuration you have.
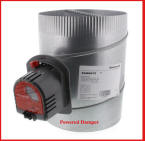
In my case, Honeywell, normally open, powered closed dampers were installed in the return lines.
Non-powered Dampers:
Beside powered dampers, there are also manual close dampers and those that respond to air pressure in the duct work.
Manual dampers can open be found in areas like basements, etc where heat or cool are not normally needed and there is no thermostat. In this case the homeowner simply manually opens or closes the damper as needed.
In most forced air systems, a "bypass duct" is installed. The idea is to reduce air pressure when needed by allowing some forced air to be bypass to a return duct. In some cases, the damper installed responds to air pressure and openly opens if the air pressure in a duct gets too high. These dampers might have a weighted adjustment or may not. Some might even be powered but most are not.
Damper control:
In a zoned system (more than a single thermostat) a control board of some type is used. In my case a Lennox Harmony III. It is this control board that takes thermostat inputs and supplies power (24VAC) to dampers in zones, as required to satisfy a call for heat or cool.
Damper Adjustments:
AS I said, I paid to have powered dampers but signed off on work completed too soon.
In my case, the new powered damper in one return line was never opening. As the new Honeywell, normally open damper has a visual as to status of valve inside the duct, I could clearly see that the valve inside was stuck closed (removed power to damper and spring as part of damper motor should have opened the valve but did not._
So, removed giant zip ties around one end of return line damper, removed foil tape and slid back flex duct insulation exposing valve inside damper housing.
As expected, valve on inside was in closed position but that made no sense as damper was of the normally open type.
In this case, damper housing was installed upside down!! Meaning the valve in the sheet metal actually has control shaft sticking out the top and bottom of the housing and the motor can be attached to the "top" or the "bottom". In this case, the technician that installed the damper installed it such that the motor when powered was always try to close a default closed damper. So point being: if you are installed a new powered damper, make sure motor is fitted on the correct "top" of the damper housing.
With motor attached to the wrong orientation of the damper housing, had to remove the damper housing completely. This is when I found out that Honeywell motor attaches to the damper shaft via a TORX set screw. Torx is the star shaped head. If you are replacing the motor on an older damper housing, going to have to peel back insulation, etc enough to see how motor is attached to damper shaft
With Torx set screw loosened, I lifted off motor, reversed damper housing and went to install the motor. This is when I learned that the Honeywell powered damper does not have a flat spot on the damper shaft. It is completely round, which means, to get the motor to completely close the damper, when powered, you have to set the motor on shaft, tighten the Torx screw and then power the damper and watch valve operation. This means that you may have to slightly move the sheet metal valve in the damper housing and then attach the motor to get a perfect open or close.
I was not present when the Honeywell powered dampers where unboxed and installed and do not know if motor came attached to damper housing or not. And my point is, even if motor comes attached to damper shaft right out of box, since damper shaft is perfectly round, you going to have to verify proper opening and closing before attaching duct work to damper.
Install a new Damper:
If you are going to install a damper in a duct that does not have a damper currently (such as in my case with no return line dampers installed), flex duct is easily cut with a box cutter and then wire cutters to cut metal coiling. No experience in square or rectangular ducts or powered dampers.
24VAC. Before you install a new powered damper where no damper existed before, you have to research and confirm that the 24VAC transformer in use in your system to power dampers can support the total number of dampers that are going to be used.
As an example, in my case, I had 3 dampers installed in my system but wanted to go to 6 (2 on return lines and 1 for a bypass damper). In this case, the transformer installed in my furnace could not support 6 dampers and I had to add an additional 24VAC transformer that powers my Harmony III control board and all damper power. If your system can not handle the required number of dampers, suggest you get a HVAC technician to add a second transformer and make sure the existing transformer and new transformer are configured to be "in phase".