![]()
![]()
![]()
![]()
![]()
![]()
Ron Stultz
![]()
![]()
BMW X5 - "How to Replace Front Brake Pads"
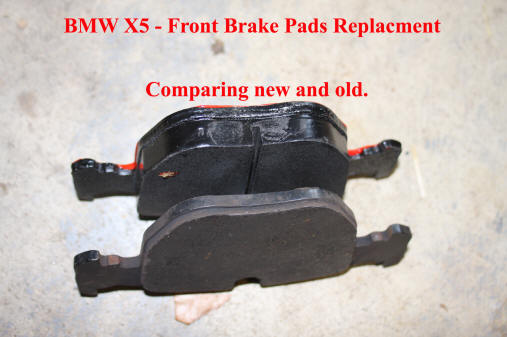
Summary: after do-it-yourself (DIY) oil change, replacing brake pads comes next as an easy DIY task. Upon review, you will be amazed how much the dealer wants to charge for such a relatively easy job!
Background:
BMW X5, 4.4l, sports package, 129,000 miles.
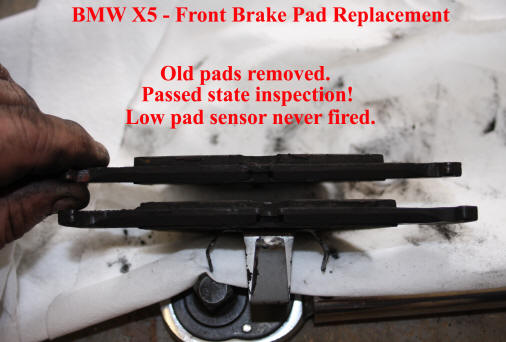
State safety inspection on 5 March 2010 revealed front pads extremely thin BUT no indicator light on dash indicating pad replacement needed!
As I have not notice any sort of shimmy when braking or at other times, I assume rotors are "true" meaning they are not warped and thus did not need replacement.
As no wear sensor ever lit up the instrument panel, I did not order and install new. From what I gather, these are "on-shot" sensors meaning they only need replacement if they have "fired" a warning.
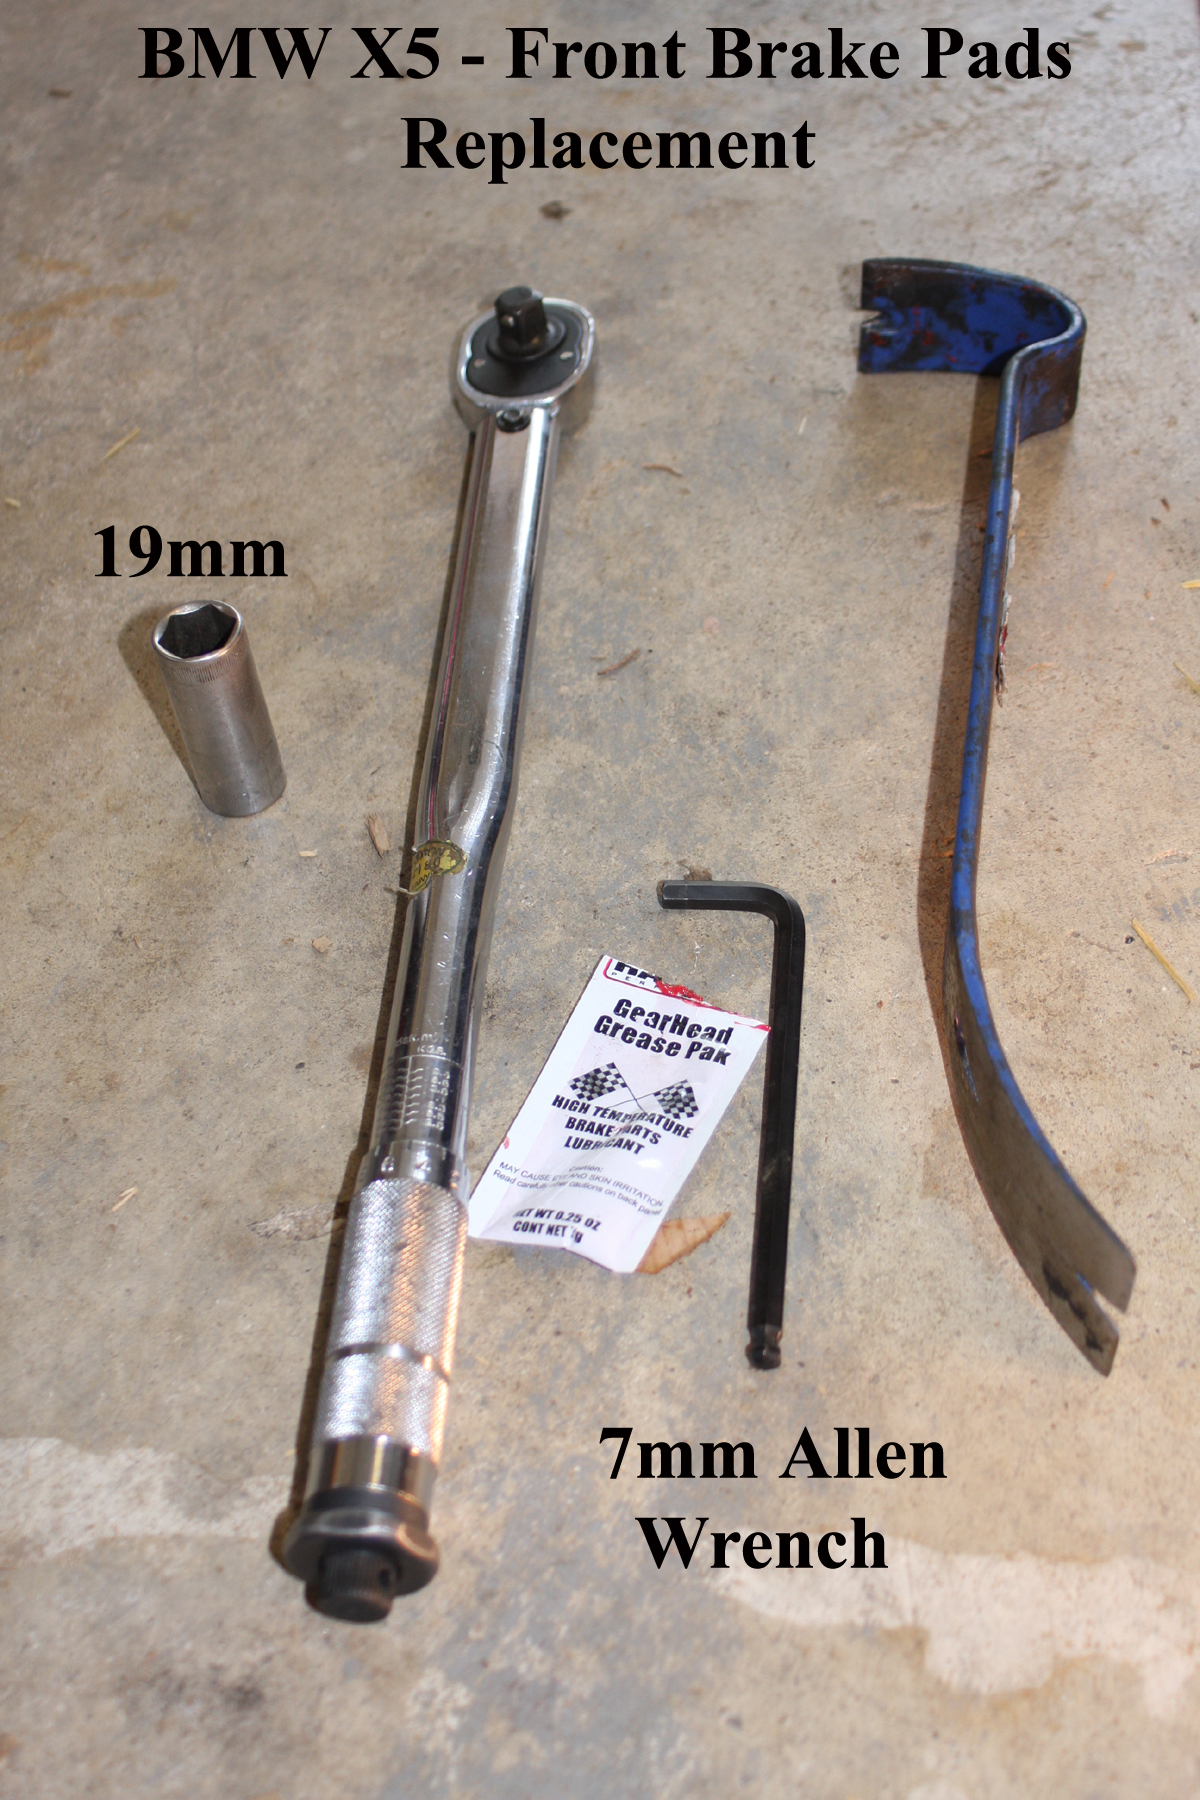
Tools/Supplies needed:
- Lug nut wrench or long handed ratchet and 19mm socket.
- Metal pry bar or long, heavy, flat blade screwdriver.
- Torque wrench.
- 7mm Allen wrench and 7mm Allen socket for torque wrench.
- 3 packets of BMW brake pad "grease". Note here that you can buy disk brake anti-squeak but I like the BMW grease better.
- Small pair of needle nose pliers.
- Wire brush.
- Spray brake cleaner.
- Cheap dust protection face masks.
- Paper towels.
- Gloves, if you so inclined.
- Hand cleaner like GoJo.
How to install front brake pads:
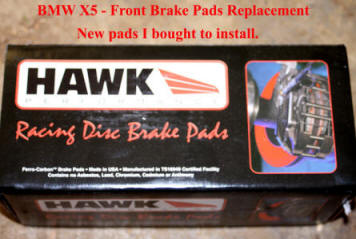
1. Buy front pads. Many different types ($'s) pads are available from many sources. I bought from Internet website and supposedly better than BMW stock. Note. The harder the compound of the pads, the more likely they are to squeak.
2. Using bottle of anti-squeak "grease", cover the entire metal side of the new pads. DO NOT GET GREASE ON PAD SURFACE. The pad with the 3 prong metal clip on the back is the "inner" pad. The 3 prong clip is going to be pushed into the caliper piston. Besides the metal surface, apply a small amount of "grease" to the ends of the 3 prongs and also the backing metal at the top and bottom where the pad is going to sit on the caliper edge. Once anti-squeak is applied, set new pads aside composite side down on a clean surface, like paper towels. Note here, after changing pads more than once now, I like BMW pad grease better.
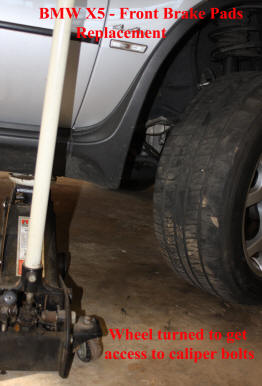
3. Park car on level surface, turn steering wheel all the way such that wheel is pointing inward for passenger side brake caliper access or outward for driver's side caliper access.
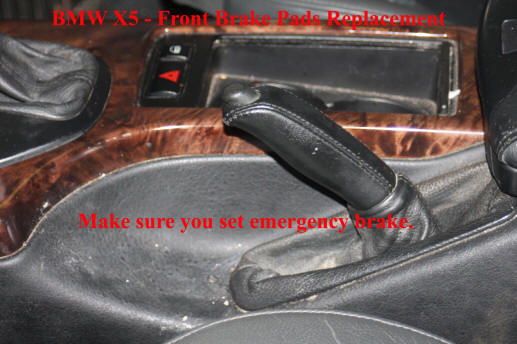
4. Set hand brake. DO NOT FORGET THIS.
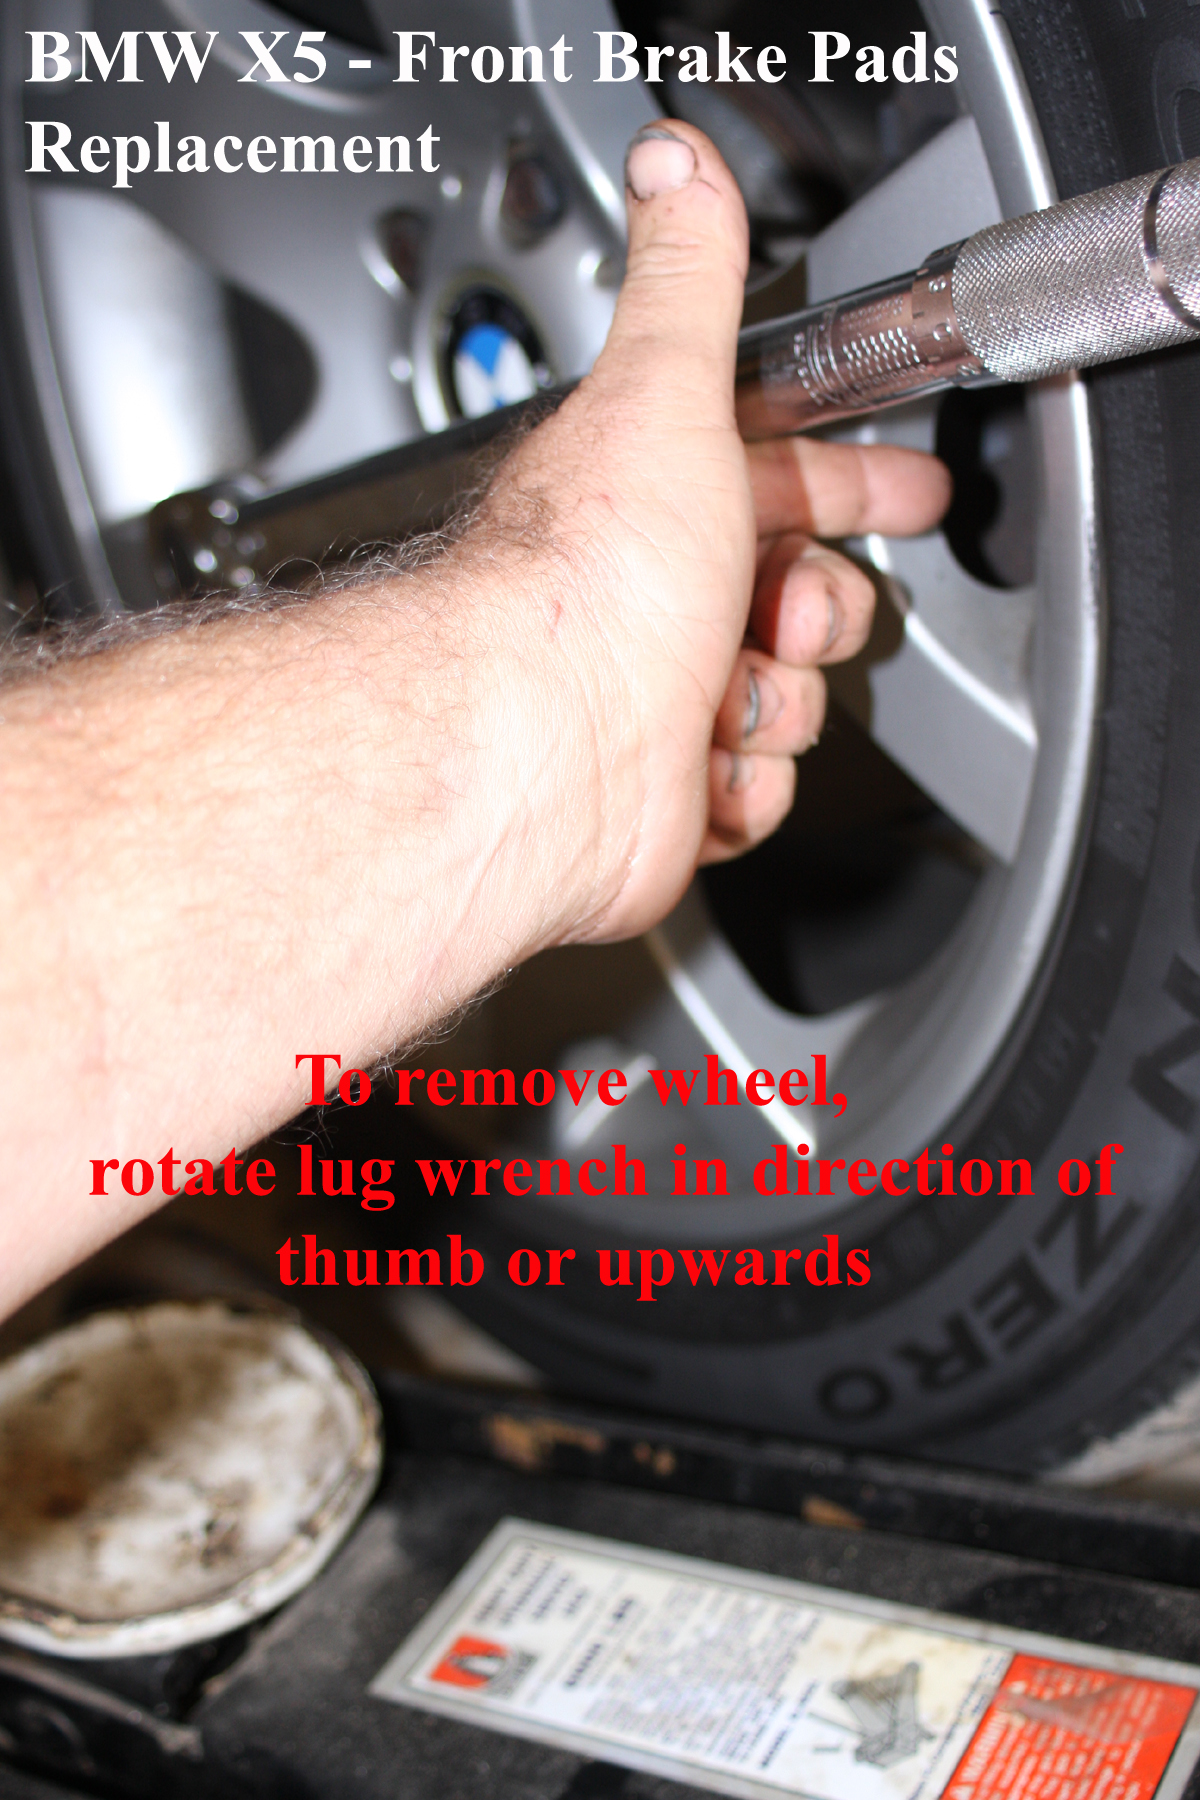
5. Using jack, start on passenger side and lift car up enough that tire is off the floor. If the wheel has not been off the X5 in a long time or if an air impact wrench was used to tighten the lug nuts, they might be tough to remove. The longer the handle of the wrench being used, the more leverage you can get. There are have been times that I had to actually stand on the end of the lug wrench to get a lug nut loose!
6.Here, a word about safety is required. With the wheel off the car, there is always a possibility that the jack will fail or the car will slip off the jack. So, use jack stands or other to keep car from falling all the way down and potentially on you.
7. Remove lug nuts and then wheel from X5. Depending on the diameter of wheel, wheels can be heavy and so be careful lifting it off. Set under front of X5 as a support in case of the X5 failing off jack.
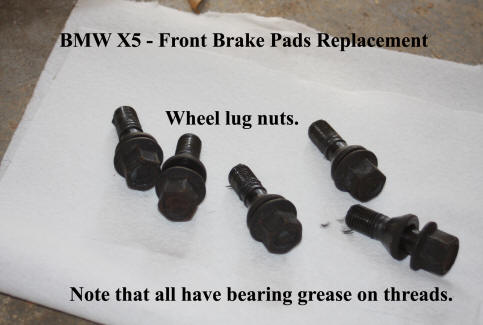
8. If lug nuts are dry, meaning that do not have any sort of lubricate on them, use some wheel bearing grease and lube the threads of each lug nut. Lubricated lug nuts will make it ever so much easier to remove lug nuts in the future.
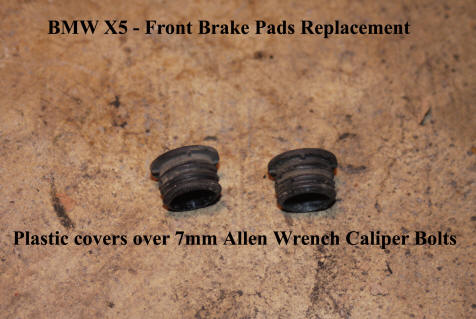
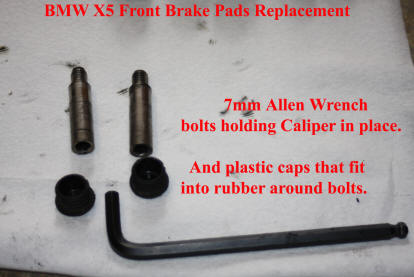
9. With wheel off the X5, examine caliper. On the back side, find 2 rubber boots. The bolts that "hold" the caliper in place are inside these rubber boots. Each boot has a plastic cap on the end of it that you must remove to gain access to the head of the caliper bolt. In my case, a finger nail was all that was required to get the plastic cap to remove.
10. With caps off the end of the 2 rubber boots, using a 7mm Allen wrench, insert wrench into bottom rubber boot and home wrench into head of bolt there. To remove caliper bolt, push downward or counterclockwise on the head of the bolt. The bolt will be tight but do not use a hammer or other. Just increase downward hand pressure and bolt will suddenly loosen. Note here, you can also use a 7mm Allen socket on a ratchet to remove these bolts.
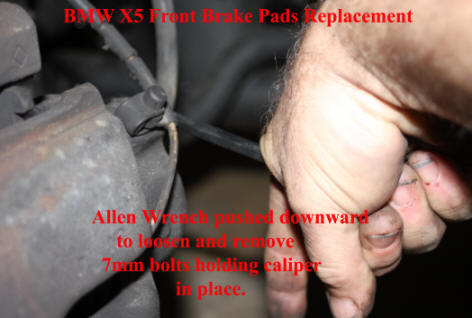
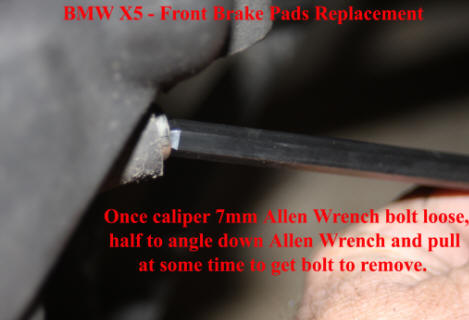
11.Unscrew bottom-most caliper bolt. Once loosened, I removed bolt completely to get it out of the way and prevent any damage to the threads. As the bolt is tight inside the rubber boot, to remove, you will have to hold the Allen wrench at a slight down angle and turn slowly to extract the bolt completely.
12. Remove upper caliper bolt.
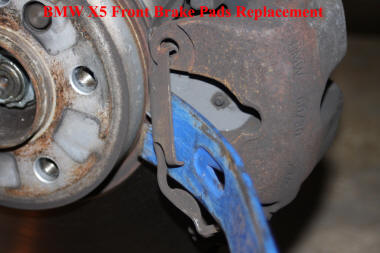
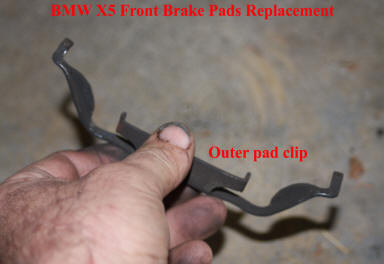
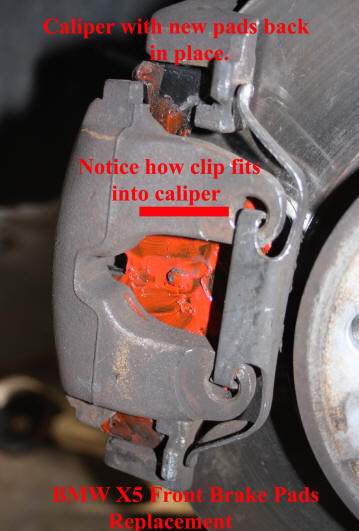
13. Examine the outer pad clip and how it is clipped to caliper.
.jpg)
.jpg)
14. Using a pry bar or heavy-duty flat blade screwdriver, remove the outer pad clip.
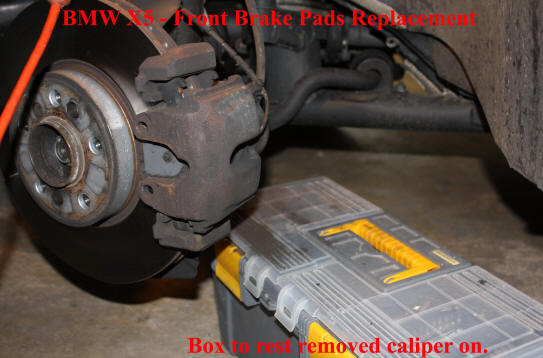
15. Find a box or other to help support the caliper once you have removed it. You do not want caliper weight to hang totally on the brake fluid hose. I used a plastic tool box.
16. As caliper piston is going to have to be completely compressed into the caliper for new pads to be used, while caliper is loose and old pads still installed, use a pry bar to press piston back into caliper. If no pry bar, a heavy-duty screwdriver, long enough to get decent leverage will work.

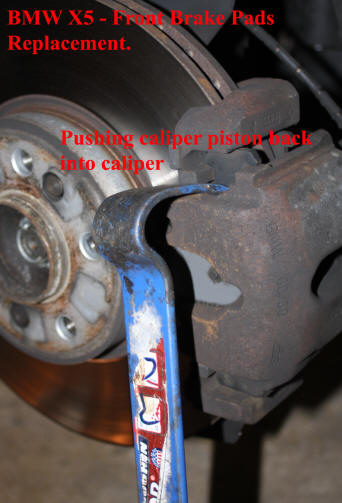
17. Compressing piston may take movement of the pry bar or screw driver several times. The face of the old pad and the caliper body is where pry bar or screwdriver should be used. Do not pry against the rotor.
.jpg)
18. When it appears that you have compressed the caliper piston completely back into the caliper (prying does not seem to be causing any additional old pad movement), lift off the caliper.
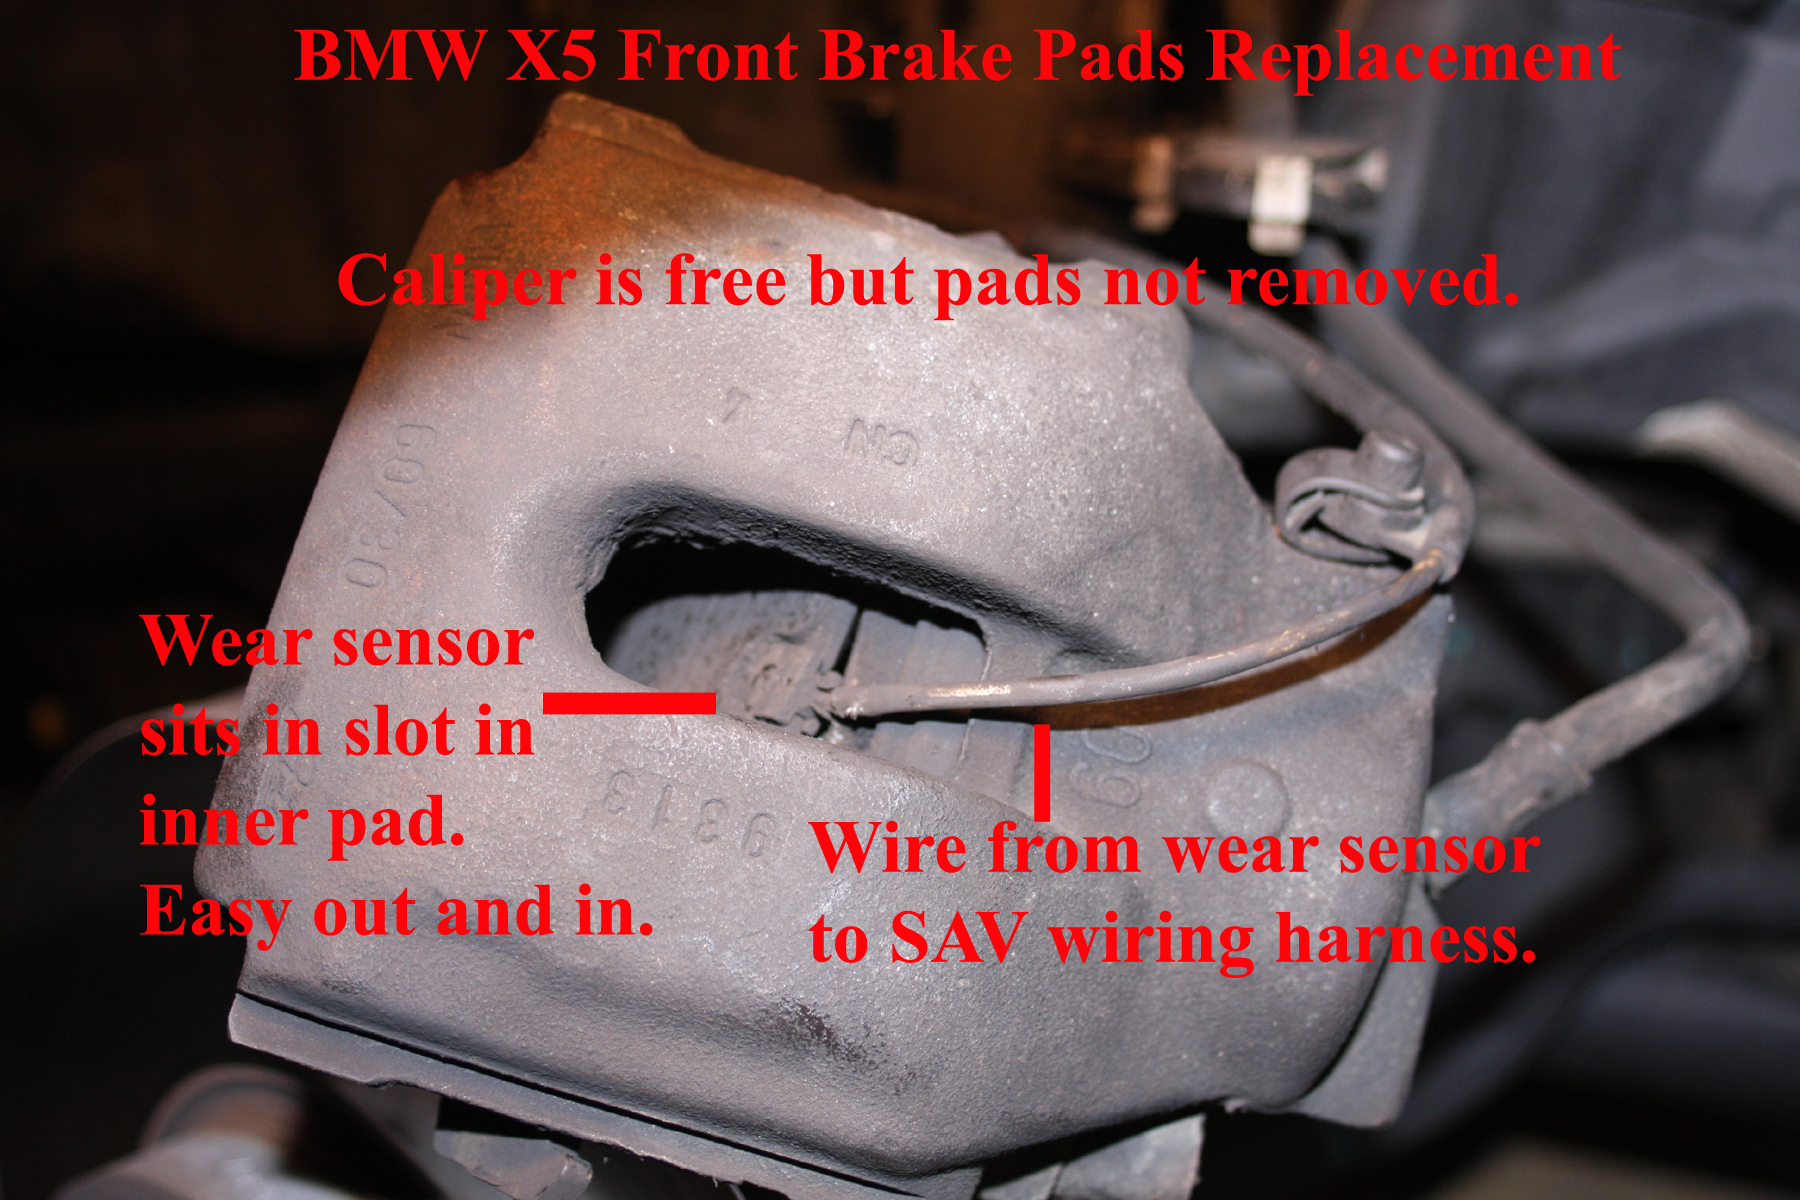
19. On the passenger side, the brake wear sensor is attached to something in the front and you do not have to worry about it but on the driver's side, the brake wear sensor is fitted to the inner brake pad, and you must remove sensor from pad to be able to remove old pad. You do this by using needle nose pliers. The sensor is simply pressed onto the old pad and can easily be pulled off but pull at the sensor and not the wire into it! (Note: wear sensor appears to be nothing more than a metal loop that completes a circuit. Once pad gets thin enough, wear sensor going to touch metal of rotor and be quickly eaten, opening circuit, which then triggers instrument panel lamp. If wear sensor fires instrument panel light, sensor will have to be replaced.)
20. Remove old pads. Outer pad should easily lift out while inner pad is pressed into the caliper piston and might need some gentle pulling for it to remove.
21. Now take a wire brush and knock the crud off the caliper "carrier". The carried is the guide the brake paid metal ends slide on. You can remove the carrier if you wish but I have found these to be on quite tightly. Once you have properly cleaned the "carrier" use brake cleaner to clean the carrier. Now use the wire brush on the caliper where the new pads are going to sit or move. Once brushed, spray with brake cleaner. Also spray clean the 7mm bolts.
22. With carrier clean and caliper where pads going to sit and move, apply BMW pad grease to any metal part where pads are going to touch or move along. Do not put on pad face but everywhere else gets grease. Inner pad will have to have the prongs on it, pushed into caliper piston.
23. If wear sensor was mounted to inner pad, use needle nose pliers to reinsert sensor to middle of inner pad.
24. Take outer pad and place into caliper. Now take caliper and see if caliper with new pads installed will fit over rotor. If caliper will mount, no problem, but if caliper with new pads will not fit, you going to have to use pry bar against caliper body and push on new inner pad to compress piston all the way into the caliper.
25. Once caliper with new pads will fit around rotor, time to reinstall 7mm Allen-head bolts. Place bolt into rubber boot and push it in until it fits caliper mounting plate. Move caliper around slowly until bolt aligns with it hole in plate. Now use 7mm Allen wrench and begin pulling up on wrench to tighten bolt. Before bolt is completely tight, insert other bolt and tighten. When both bolts inserted and almost tight, tighten both. A good, strong, pull upward, by hand is sufficient. Tighten until bolt will not move anymore. Using 7mm Allen socket on torque wrench, tighten to ?? foot pounds (thought it was 50 but someone reported to me that 50 snapped off a 7mm bolt). Once you are sure 7mm bolts are tight, reinstall plastic caps into rubber boots.

24. Reinstall outer pad clip. This can be a little pain in the ass as you need to get clip to mount in small holes that are in large holes in caliper and then get clip outer edges to slip over the edge of the caliper. Consult the images of the clip before it was removed to confirm how it must mount.
25. Look over ever thing. Wear sensor wire, if any, properly attached to inner pad? No kinks in brake line hose? Brake line hose showing any sort of cracks or leaking? Anything wrong at all? Take your time and look everything over well. If something does not "feel" right, it is not and stop and figure it out. Walk away and take a break of 5 minutes. Then come back to SAV and check over again with fresh eyes.
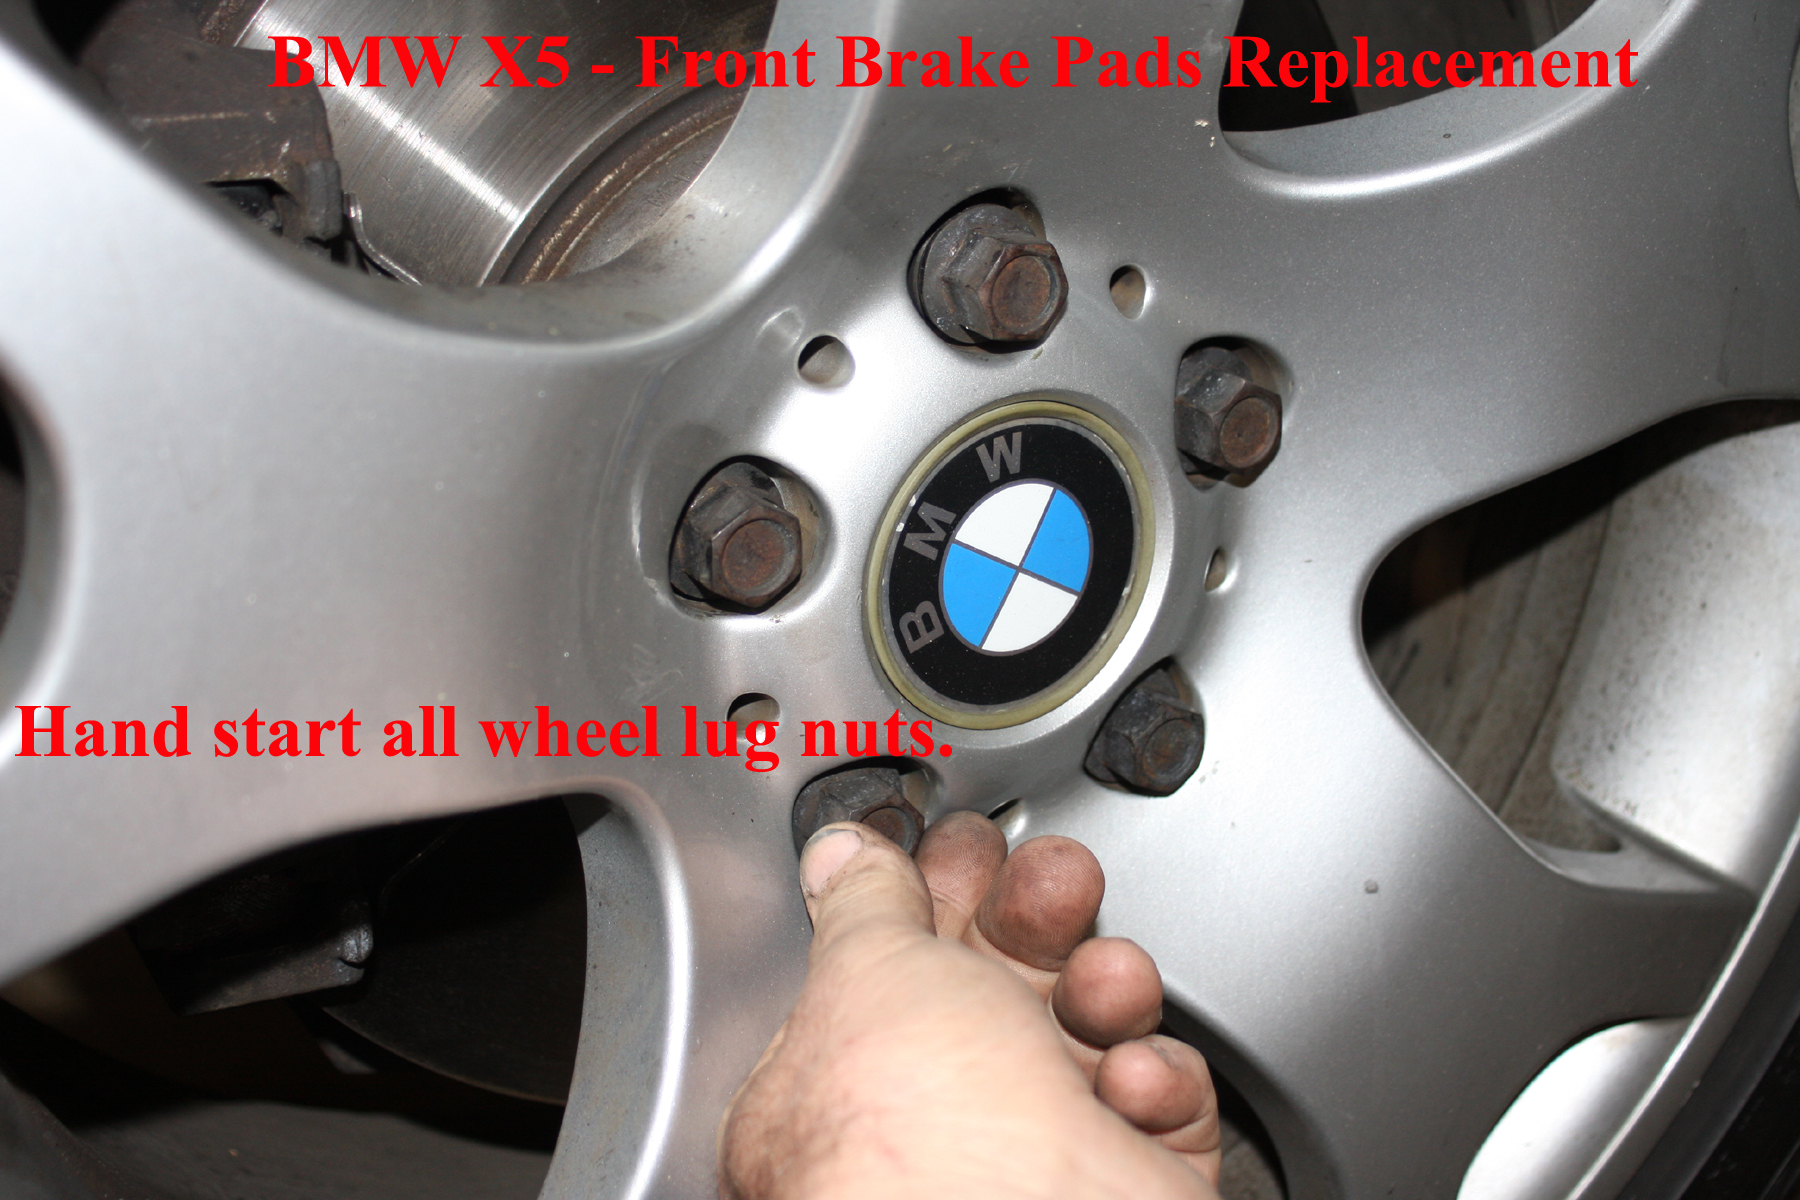
25. Move wheel back into position and lift up and then looking into lug nut holes in wheel, align with holes in rotor face. Now take greased lug nuts and hand thread each and every one. Installing lug nuts on the X5 and not cross threading is not all that difficult but on some cars, it is incredibly easy to cross thread if you try threading from start using a lug wrench. Insert all lug nuts hand tight.
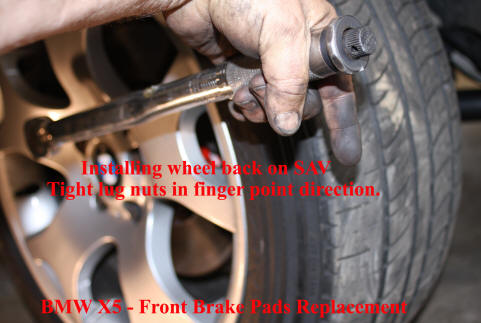
26. Using lug wrench or ratchet and 19 mm socket, tighten each lug nut. Tighten one nut and then jump to lug nut opposite one just tightened. Always want to oscillate lug nut tightening. Once all are relatively tight, use torque wrench to tighten to 80 foot pounds. After all tightened, check around all lug nuts again. I actually saw a car go off the road once because only 1 of the lug nuts was tight.
27. Slowly ease off jack so wheel is lowered down to the ground.
28 Clear work area. Clean all tools and your hands. Move all tools and jack to other side of X5. Take a break.
29. Start X5 and turn wheels so that caliper of wheel to be worked on is pointing outward.
30. Repeat above for other wheel. Remember, just because you have done one side does not mean you are now an expert. Go slowly and be careful.
31. Once both sides are done and you are sure all lug nuts are tight, release hand brake and start car. Brake pedal will probably feel mushy and you might have to push down hard several times to get the pedal to come up to its normal position.
32. New pads do have a break-in period. The pads I bought suggested that at first drive, at 40 - 50 miles per hour (mph) I lightly tap on the brakes 7 or 8 times and then increase speed to 60 or more and again, tap on the brake pedal 7 or 8 times. Do not do any sort of extreme hard stop for the first 50 miles or more.
33. Even with the use of anti-squeal on new pad backs, you might hear some squeals for a couple of days but it should go away.
Finally, a check of the X5's maintenance records indicate that I got almost exactly 3 years and 43,057 miles on the previous BMW set of front brake pads. And at the time of that dealer service, the rotors were replaced.
Update 5 June 2011:
Either the compound of the pads I bought was too hard or I did not clean the carrier well enough or the non-BMW anti-squeak was not right or I should have replaced the rotor because brake squeal never went away!!! After a while, I decided to install new rotors, rebuilt calipers and new softer pads. Perfect now.