![]()
![]()
![]()
![]()
![]()
![]()
Ron Stultz
![]()
![]()
BMW X5 - "Dash Removal"

Summary: because dash is one piece, must remove steering wheel, windshield washer control from steering column and loosen and pull back center console.
Background:
BMW X5, 4.4i, model year 2000.
187,000 miles.
Cabin blower dead and dash had to be removed to replace blower.
Dash removal with blower replacement, $1500 from independent shop.
Tools needed:
A variety of Torx screw drivers. Most smaller than T40.
Several lengths and sizes of Phillips screw drivers.
Several length and sizes of flat blade screw drivers.
Ratchet and several size sockets: 17 millimeter (mm) (?) and 13mm.
Dash removal overview:
Not going to provide every step of dash removal but:
- Before doing anything, remove center console side panels that goes up into foot wells. One Phillips screw holds into place and then pop off and separate from back console side panel.
- Move seats fully forward and remove console side panels by popping them off console.
- Remove all screws holding console to chassis. (3+) on each side.
- Lift out CD compartment in center console arm rest and remove screws there.
- Pop up plastic piece around gear shift lever.
- Pop out around parking brake.
- Console needs to be loose so you can move it to remove dash.
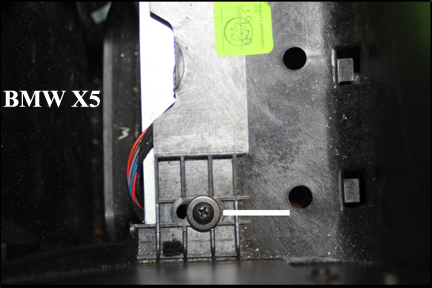
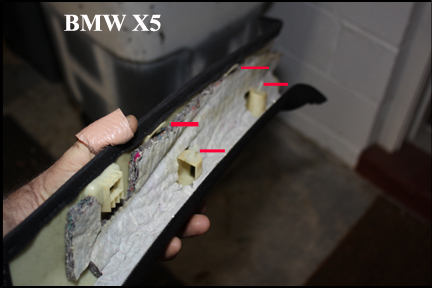
- Images below show holes in dash that host 3 plastic prongs on the center console.
- The center console has to be lifted up from the back while being pulled to release prongs from dash holes.

- Move seats fully backward.
- Move steering wheel fully out and down.
- Find the 2 holes on the back of the steering wheel and rotate wheel so holes are vertical or top at 12 o'clock and bottom at 6 o'clock.
- Disconnect battery. Never, ever, work with around airbags with power applied.
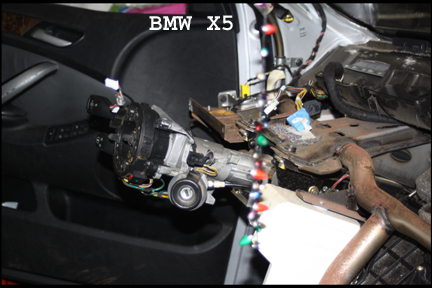
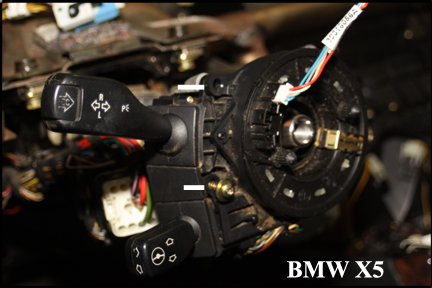
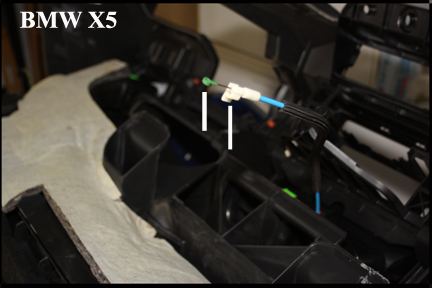
- Remove the steering wheel and windshield washer control from the column.
- Image below shows steering wheel removed and windshield washer switch removed from steering column.
- Dash is one piece and more or less sits in car with screws in foot wells attaching it to some support metal.
- Most screws are Phillips.
- Removing foot well screws easy enough.
- All center controls: button panel; temperature control and radio simply set in dash and are easily removed with a thin flat blade screw driver along one edge, prying upward.
- Note on radio, need to pry up from left side as there is a metal tab and connector on the right side,
- The CD player is held in place to a plastic support built into the dash by 2 Torx screws.
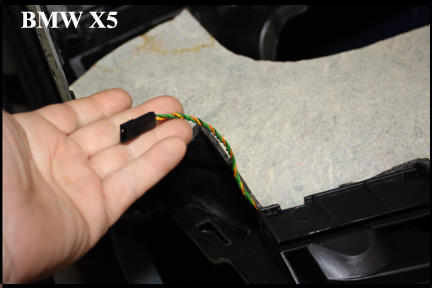
- Although color coded, suggest you label each connector as you remove it from radio, etc.
- Remove the instrument cluster. Small Torx screws.
- Remove headlight switch unit from dash.
- Remove the airbag in the dash. The dash panel will pry upward but does not move very far as it is constrained by straps
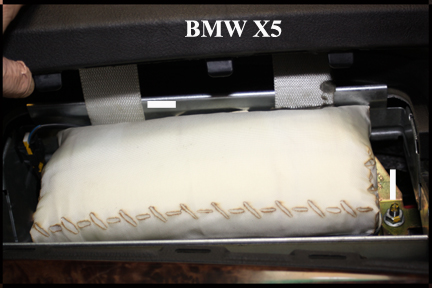
- Use ratchet and socket to remove nuts holding airbag to support bar in dash.
- Unplug airbag from socket and remove. Note here: always handle airbags gently!!
- Now remove airbag dash cover by pulling it upward and out.
- Remove thin metal airbag frame from dash. Getting this out of way helps with glove box removal.
- Remove pillars from side airbags.
- Remove plastic cap at top of each pillar cover and use Torx wrench to remove screw.
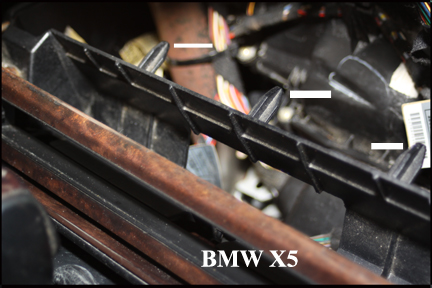
- Image below shows pillar cover fully removed to show you how cover attached to chassis.
- You slowly pull cover back off the pillar and away from the pillar.
- Go slow or you could snap the plastic in the pillar cover.
- There is no need to remove vents from dash as air duct work is attached to dash and will come out with dash.
- The image below shows the dash completely out and how duct work is attached to dash.
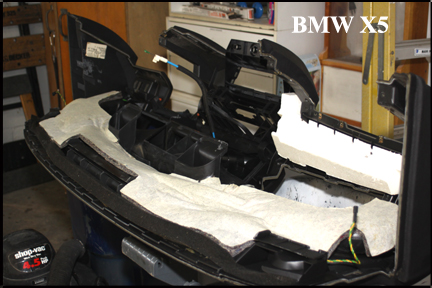
- Image blow shows how dash duct work simply sits on climate duct work.
- Although not specifically shown, the cabin blower is just behind the 2 center foam ducts and easily removed via clips and a Torx wrench.
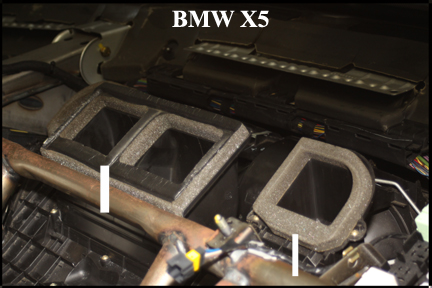
- There is however a cable from the dash dual center vents that you will have to remove from the part of the dash that remains in the car.
- With the airbag and thin metal frame out of the dash, you can trace the cable to where it attaches to a lever and then unhook it from the lever and then unsnap the cable from where it is clipped to the plastic of the climate system plastic.
- If you think you are ready to pull dash out, check it over for screws again. They are hidden sometimes here and there.
- From center of dash, begin to pull it backwards. It should move easily away from the windshield.
- If you have speakers up in the corners of your dash, make sure find connectors and disconnect them.
- Continue to move dash straight back.
- Right where the center console mates with the dash, there will be resistance as the 3 plastic prongs of the center console are in the 3 holes in the dash plastic.
- Use one hand to lift up the rear of the center console and at the same time, pull the dash up and away from the center console prongs.
- Go slow as do not want to break either console prongs or plastic part of dash.
- Once the dash is clear the center console prongs, dash should lift up from bottom easily.
- If you still getting resistance, check again for screws.
- With dash loose, plan on taking it out the right side.
- Dash weighs about 30 pounds maybe and can be lifted out by one person but 2 is better.
- With dash out, good time to clean dash area in car.
Dash install:
- Check all clips. Centered on holes in dash?
- Check all connectors that are part of dash that stayed in car. All tight?
- All center cables up and out of the way?
- Phillips screws. Some Phillips screws are long, some short. Some have fat heads and some skinny. Suggest you try to use a short screw first in most locations and if it does not latch into clip, remove and try longer one. Most large headed Phillips go in foot well against another plastic piece for chassis metal.
- Torx screws that hold plastic ring on steering column, do not bottom-out into the metal of the column. I mean by this, they do not pull flush tight. When you get shroud back on column, column switches will be locked into place and not move.
- Take dash to car and insert it more or less straight into car and then up.
- Reconnect speaker cables on either side.
- Now lift dash up and push it back against windshield.
- You will encounter resistance, bottom center.
- Here you lift up on center console from the back and push dash towards windshield. Dash should slip in behind center console and center console prongs find the holes in dash plastic.
- Note on radio. On install, everything worked but radio would not turn on. No lights, nothing. Worried about anti-theft feature and perhaps having to have some code to get radio working again, but since it would not even light up.... Removed CD player and checked huge connector on back. After making sure all connectors correct and tight, radio worked, no problem.